How to Transfer Voice Memos from iPhone to Mac Quickly
Summary
How to transfer voice memos from iPhone to Mac? In this iMobie guide, you will find a quick way to transfer voice memos from iPhone to Mac in just three steps.

Sept. 01, 2016
by Joy
Follow @iMobie_Inc

AnyTrans – Quickly Transfer Voice Memos from iPhone to MacBook and iMac 
AnyTrans – #1 iPhone File Manager Tool
AnyTrans is capable of transferring voice memos, music, movies, photos, from iPhone to PC/Mac and vice versa. Download it on your computer after reading this guide on how to transfer voice memos form iPhone to Mac.
Apple's iPhone 7 is expected to launch in 2016, have you prepared well for the new round of iPhone to iPhone Upgrade? If not yet, you can take a minute to read our comprehensive and detailed How to Transfer iOS Data from an Old iPhone to a New iPhone tutorial.

Transfer Voice Memos from iPhone to Mac
The iPhone comes with a built-in digital voice recorder which allows you to record audio anytime and any where. With the Voice Memos app on your handy iPhone, it is very convenient and easy to record the important moment in your life, like a wonderful lecture or business meeting.
To keep the iPhone data for the safety reasons, many users are tend to save the iPhone content on their home computer. That's because they know that their iPhone data might be lost when syncing with iTunes or after a new iOS update. So how to transfer voice memos from iPhone to Mac as a backup, and play them on your computer? Now read this iMobie guide to download voice memos from iPhone to Mac in just three steps.
Also Read: How to Transfer Data to iPhone 6 >
The Tool We Will Need
1. An iPhone with voice memos you need to transfer;
2. A USB cable;
3. A Mac computer;
4. An iPhone content manager-AnyTrans;
AnyTrans is a comprehensive iPhone/iPad/iPod content manager which is made to make your Apple life easier and simpler. AnyTrans allows you to transfer voice memos, music, playlists, videos, photos, contacts, messages, notes and more to computer as backup. And it also manages to transfer media files to iTunes or to another iOS device which helps you upgrade to a new iPhone 6/6s with ease. In addition, it enables you to access iCloud backup and download iCloud content to your Mac/PC, including messages, contacts, voice mail, bookmarks, call history etc. (New version of AnyTrans supports almost all iPhone models, including iPhone SE/6/6s/5/5s/5c/4/4s.)
How to Transfer Voice Memos from iPhone to Mac with AnyTrans
Firstly, download and install AnyTrans for Mac on your computer, then follow the 3 steps below to quickly download voice memos from iPhone to your Mac, no matter MacBook or iMac.
Step 1. Launch AnyTrans on your Mac, and connect your iPhone to the computer. Go to the page below and choose Audio > Voice Memos.
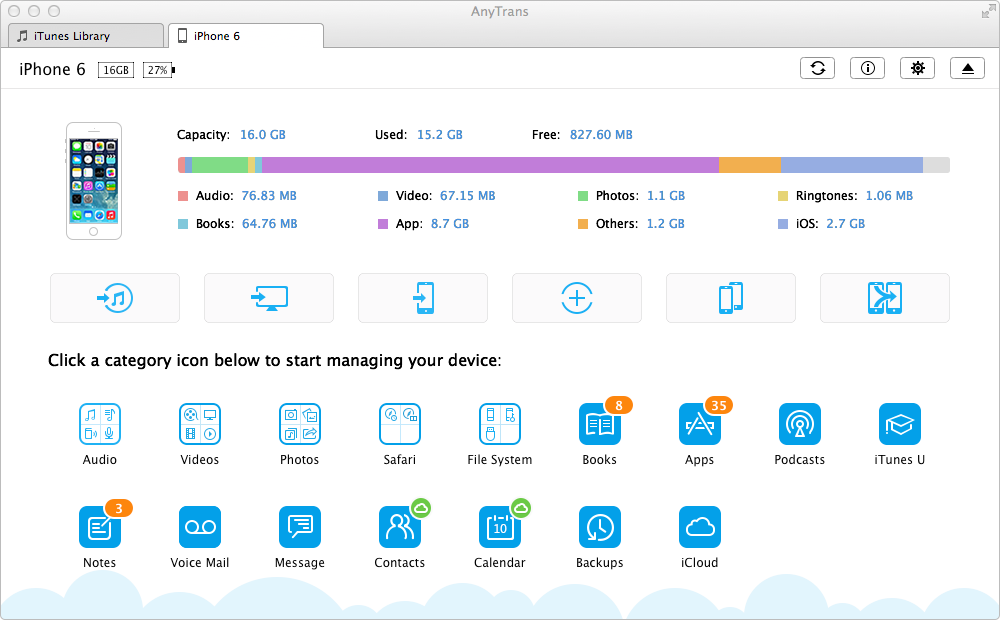
How to Transfer Voice Memos from iPhone to Mac with AnyTrans - Step 1
Step 2. Select Voice Memos and click Send to Computer button.
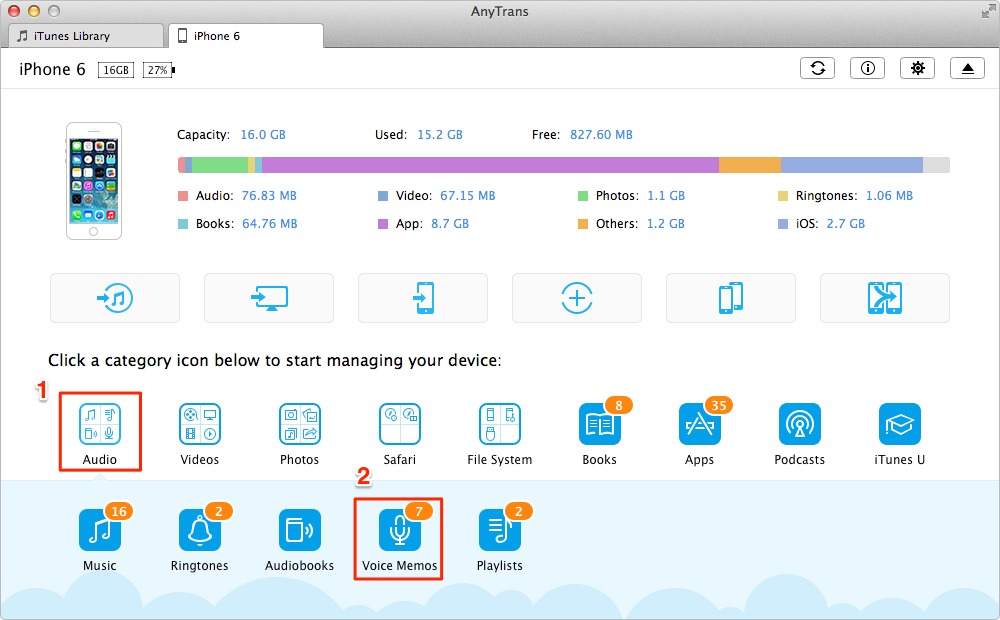
How to Transfer Voice Memos from iPhone to Mac with AnyTrans - Step 2
You May Like: How to Get Back Voice Memos on iPhone >
The Bottom Line
Besides transferring voice memos from iPhone to Mac, you can also easily transfer them to iTunes, and to another iOS device. Download the free trial of AnyTrans to take a tour. Any question on this guide or AnyTrans is warmly welcomed, meanwhile, don't forget to share this guide with your friends.
What's Hot on iMobie
-

New iOS Data to iPhone Transfer Guidelines > Tom·August 12
-

2016 Best iPhone Data Recovery Tools Review >Joy·August 27
-

2016 Best iPhone Backup Extractor Tools > Tom·August 16
-

How to Recover Deleted Text Messages iPhone > Joy·March 17
-

How to Transfer Photos from iPhone to PC > Vicky·August 06
More Related Articles You May Like
- How to Export Contacts from iPhone 6 - Here you will get an easy way to export contacts from iPhone 6. Read more >>
- How to Transfer Photos from iPhone 6 to Computer - In this guide, you will find two methods to transfer pictures from iPhone 6 to computer. Read more >>
- How to Backup Text Messages on iPhone 6 - This guide tells you how to backup iPhone 6 text messages to computer. Read more >>
- How to Transfer Text Messages from iPhone 6 to Computer - You will know how to download text messages from iPhone 6 (Plus) in minutes. Read more >>
- How to Transfer Contacts from iPhone to iPhone – Want a way to transfer from the old iPhone contacts to the new? Check this guide to learn more. Read More >>
- How to Transfer Photos from iPhone to Mac – Learn how to offload your Camera Roll photos from iPhone to your Mac in few clicks. Read More >>
- What Is the Best iPhone File Transfer – Need an all-in-one iPhone File Transfer software to keep everything organized? Here is the answer. Read More >>