How to Import Photos from iPhone to Windows 10
Looking for one way to transfer photos from iPhone to Windows 10, for backing them up from disappearing, or simply because your iPhone storage is shy, or for putting and editing them on computer with professional software? The following tutorial will show you 4 ways on how to import photos from iPhone to Windows 10.
Base on the statistics, there are about 30 thousand American iPhone users per day, asking and searching how to import photos from iPhone to Window 10 (PC/laptop/book/pad) for the practical solution. Guess you are definitely not alone. And why do you have the need for transferring photos from your iPhone to computer Windows 10?
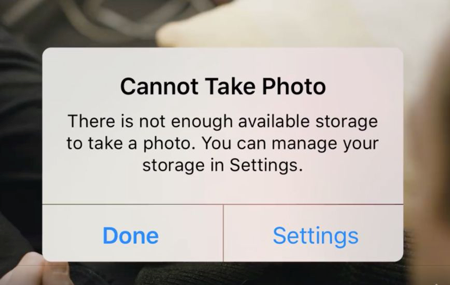
For photo taking lovers, it is very common to save hundreds, or even thousands of photos on your iPhone, because of its convenience and high resolution. But as time goes by, you’ll find the Photos App becomes the biggest storage consumer and almost haven’t available storage to take one more picture or download one more app. At this moment, more than 80% of users will choose to back up iPhone photos to computer and then delete them from the iPhone.
In this guide, we will offer you 4 methods to import photos from iPhone to Windows 10 computer. Now check for the details.
How to Import Photos from iPhone to Windows 10
Part 1: Transfer All or Multiple Photos from iPhone to Windows 10 with AnyTrans for iOS [Recommended]
As we have said above, there are a couple of ways to help you make the job done, and we will list you one by one. But which one would be the first and best? We would sincerely suggest the third-party software – AnyTrans for iOS. Because with AnyTrans, you can get these advantages to help you transfer photos from iPhone to Windows 10 computer:
- Limitless possibilities for photo transfer– You can transfer all kinds of iPhone photos, like Camera Roll photos, Photo Stream, Photo Library, photos synced from iTunes or computer, iCloud sharing photos, photo albums, etc.
- Keep all exported photos organized – All the photos transferred to the computer will be resorted by category.
- Export all iPhone photos at one click, just need a few minutes – Super fast transferring speed is fitted to export 4000 iPhone photos in 7 minutes.
- Original pictures transferred, no quality damage – AnyTrans only transfers original photos instead of thumbnails or compressed photos.
- Just a few clicks, no complicated operations – Download AnyTrans, install & run it, and start transferring your iPhone photos. Everyone can make it.
- Manage more iPhone contents, not only photos – Except photos, AnyTrans also supports managing other iOS data, like Videos, Messages, Music, Ringtones, Notes, iBooks, etc.
Next, we will show you how to import photos from iPhone to Windows computer with AnyTrans. You can download and install it firstly, and follow the steps below to make the job done, no matter you want to export all iPhone photos or just some specific photos?
Free Download * 100% Clean & Safe
Method 1: 1-Click to Import Photos from iPhone to Windows 10 Computer
Step 1. Launch AnyTrans for iOS on your Windows 10 computer, and then plug in your iPhone with its USB cable. Click “Device Manager” tab, and then click “Content to Computer” button. With it, you can select all photos on iPhone by default, and there is no need to check one by one.

One Click to Import Photos from iPhone to Windows 10 – Step 1
Step 2. Select the categories of photos you want to export to PC, like Camera Roll, Photo Stream (photos synced to iCloud server), Photo Video, Photo Library (photos synced from computer), Live Photo, Screenshot, etc. Pick up the output folder by clicking the “Select” button, and then click Right arrow button to start transferring photos from iPhone and backing up them to Windows computer.
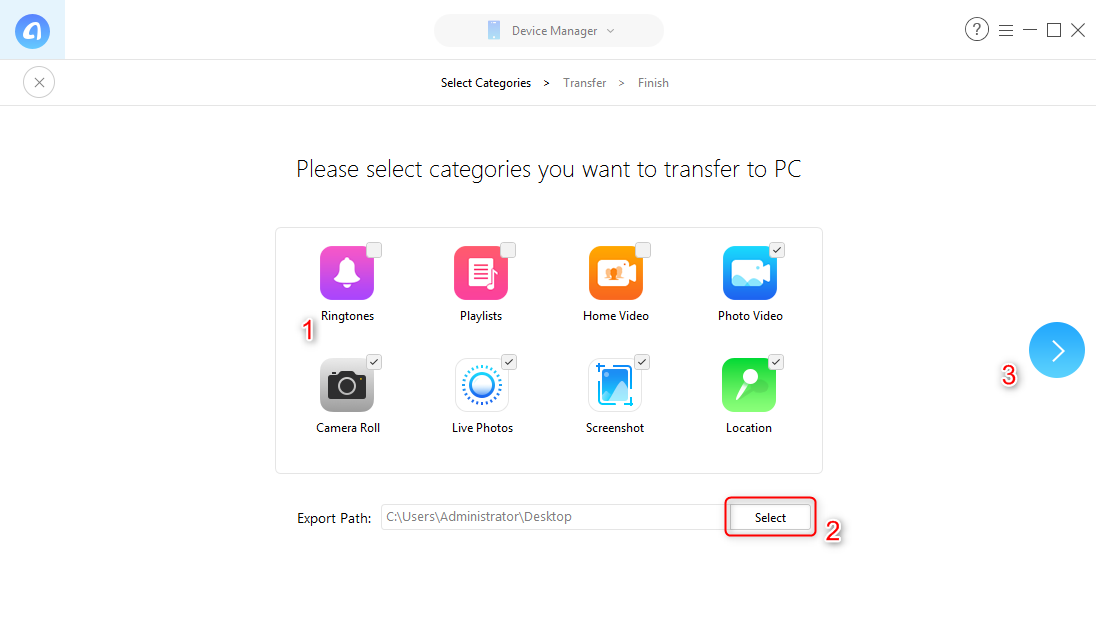
One Click to Import Photos from iPhone to Windows 10 – Step 2
Step 3. When the transferring process finished, all the photos exported from iPhone will be saved on your computer in the right folder. And you’ll find all the photos are organized in folders like Live Photos, Camera Roll, Panoramas, etc.

One Click to Import Photos from iPhone to Windows 10 – Step 3
And every single month, AnyTrans will help more than 65,000 users to successfully transfer photos from iPhone to PC with this Content to PC function. Join them and download AnyTrans to transfer your iPhone photos now.
Free Download * 100% Clean & Safe
Method 2: Selectively Import Photos from iPhone to Windows 10 Computer
Step 1. Run AnyTrans for iOS, and then connect your iPhone to the PC with its USB cable > Click Device Manager tab > Click the category page button.
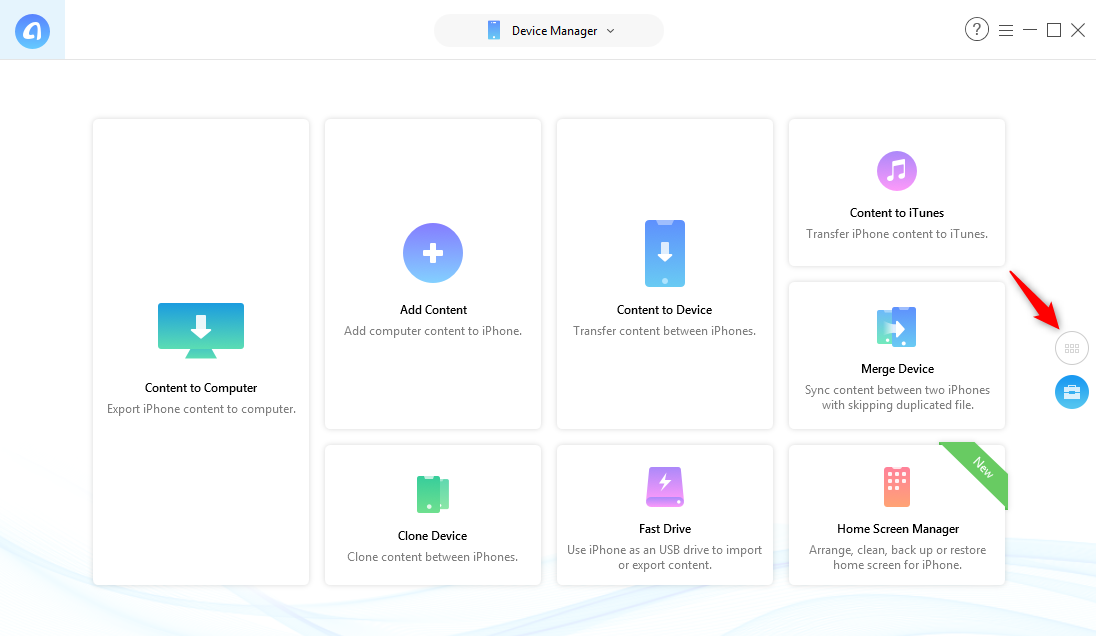
How to Import Photos from iPhone to Windows 10 Selectively – Step 1
Step 2. Select “Photos” > Select the album with photos you want to transfer to PC, like Camera Roll, Photo Stream, Photo Library, Photo Share, Live Photo, Screenshot, Location, etc. So you can see all the photo folders on your iPhone.
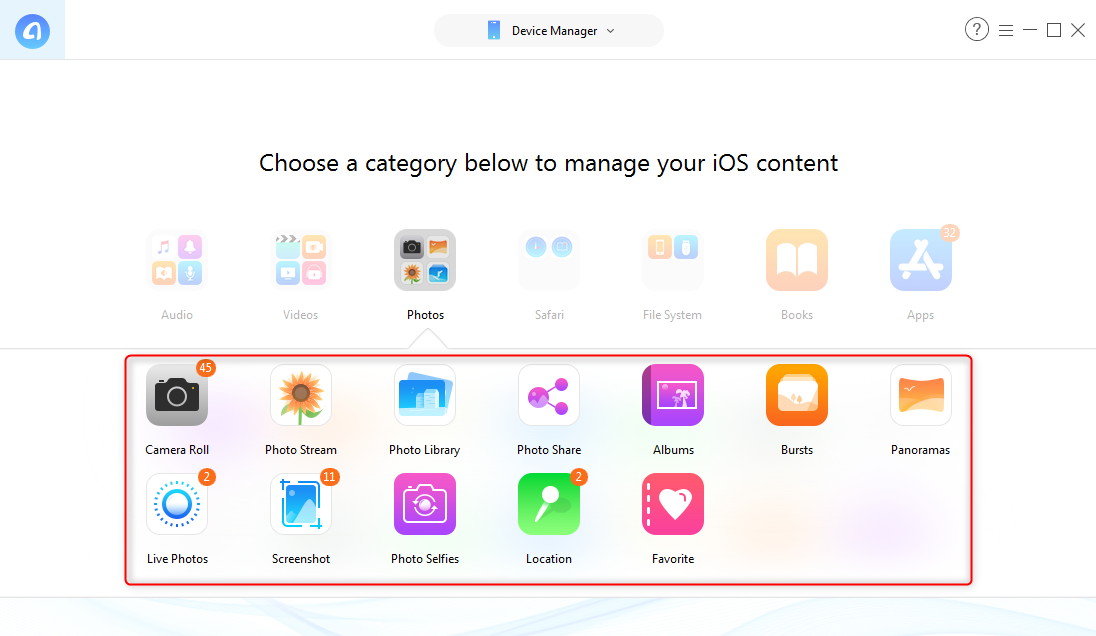
Import Photos from iPhone to Windows 10 Selectively – Step 2
Step 3. Select the photos you want to transfer to computer > Click “To Computer” button to get selected iPhone photos to your computer. You can select singular or multiple photos to transfer to PC, and then free up more space by deleting them directly with AnyTrans Delete button.

How to Import Photos from iPhone to Windows 10 Selectively – Step 3
Step 4. Check the transferred iPhone photos on your computer.
Part 2: How to Import Photos from iPhone to Windows 10 with iCloud
We can also install the iCloud app on Windows 10 to download the photos from iPhone. But before we head to the detailed steps, you need to know that using iCloud app just enables you to download the iPhone photos saved in iCloud. If the photos on iPhone have not synced to iCloud, or the iCloud storage is less than the amount of your iPhone photos, this way cannot work, and taking Method 1 would be much wiser.
1. Go to iCloud for Windows download site, download and save the app on your computer, and then install it.
2. Run iCloud on your computer, and it will require you to type in Apple ID, So just put the correct account and password to login in.
3. After that, it will automatically enter the page where you can download the iPhone photos saved in iCloud to Windows 10. There will be Photos, iCloud Drive, Bookmarks, and more that you can choose. Just select Photos.

How to Download Photos from iPhone to Windows 10 with iCloud – Step 3
4. Then select iCloud Photo Library. It will show you two options: Download new photos and videos to my pc, and Upload new photos and videos from my pc. Here we just choose Download new photos and videos to my pc, which means as long as there show new photos or videos in your iCloud, it will automatically download them to the folder that you set before.

How to Download Photos from iPhone to Windows 10 with iCloud – Step 4
Part 3: How to Import Photos from iPhone to Windows 10 with Photos App
Windows 10 Photos app is another way that we will introduce to you to transfer photos from iPhone X/8/7/6s/6/5s. But you need to know that the Photos app just supports accessing the photos in the Camera Roll folder, not including My Photo Stream, iCloud sharing photos, Synced photos from computer, etc. For transferring photos in these folders to Windows 10, please move to Part 1.
1. Please download and install the latest version of iTunes on your computer, because it will help your computer recognize your iPhone.
2. Plug in your iPhone with a USB cable to your Windows 10.
3. Open the Photos app from the Start menu.
4. Click the “Import” button at the top right of the window.
5. By default, all the photos and videos in Camera Roll are checked, and you need to click the photos you don’t want to import. Then click “Continue”.

Import Photos from iPhone to Windows 10 with Photos App (Image Credit: Windowscentral.com)
Part 4: How to Import Photos from iPhone to Windows 10 with Windows File Explorer
The last way shared in this tutorial to help you with transferring photos from iPhone to Windows 10 is using the file explorer. It will show you both photos in Camera Roll and pictures saved in iCloud, with Apple and Cloud named folder: 100Apple, 100Cloud, or 99999Apple, etc. The word Apple means that the folder contains the photos in Camera Roll; The folder with the word Cloud includes your iPhone photos downloaded from iCloud, and the number stands for the maximum quantity of photos in this folder.
But according to user’s feedback, sometimes they cannot find the folder, or the photos are missing, when they go to it. Besides, if you would like to transfer iPhone photos from My Photo Stream, or the iCloud sharing photos, or ones synced photos from computer, etc., this will not work, like Method 1.
1. Also make sure that you have installed the latest iTunes on your computer, which will help your iPhone be detected and connected. Connect your iPhone to Windows 10, and open Windows File Explorer from Start menu > This PC > Desktop.
2. Click your iPhone name > Internal Storage > DCIM.
3. Find photos in folders you want to transfer to Windows 10, and click “Copy to”.
4. Choose the location and select a folder where you want to save those photos, and click Copy.

How to Import Photos from iPhone 5s/6s/7/8/X to Windows 10 with Windows Explorer
The Bottom Line
As you can see, compared to the other 3 methods, AnyTrans enables you to easily transfer photos from iPhone to Windows 10 computer, with all photo albums covered. So why not give it a try? If you meet any problem when transferring photos, just contact us via email or leave a comment, we will reply to you as early as possible.
More Related Articles
![]()

Member of @iMobie_Inc., a die-hard fan of Apple and MOBA games, is always passionate about offering and sharing solutions to any Apple related problems, as well as Android.
Product-related questions? Contact Our Support Team to Get Quick Solution >
AnyTrans ® for iOS
The best tool to transfer, backup and manage your iPhone iPad content, even iTunes, iCloud backup files. As easy as ABC!
- * 100% Clean & Safe
Users Served