Summary
How to turn on two-factor authentication (also called Two-Step Verification) for Apple ID? This guide will show you how to enable two-factor authentication for Apple ID on iPhone and Mac.

Nov.14, 2016
by Vicky
Follow @iMobie_Inc
AnyTrans - Best iCloud Backup Extractor Tool
Free download AnyTrans on your computer firstly, and then download and view files from iCloud backup after reading this tutorial about how to turn on two-step verification on iPhone iPad and Mac computer.
 Free Download
Two-factor authentication is an extra layer of security for your Apple ID designed to ensure that you're the only person who can access your account, even if someone knows your password. Just like this sentence on Apple’s website, this two-factor authentication (also called two-step verification) will prevent other signing in your Apple ID, but the question is how to turn on two-factor authentication for Apple ID. In this guide, we will focus on solving this problem.
To turn on two step verification or two factor authentication for Apple ID, you can make it on both of your iOS devices and Mac computer. About how to turn on two step verification on iPhone/iPad or Mac, you just need to follow us with the following tutorials.
You May Also Like: How to Turn Off Two-Factor Authentication for Apple ID >
Part 1: Turn on Two-Step Verification/Two Factor Authentication on iPhone iPad
Step 1: On your iPhone, iPad or iPod touch, go to Settings > iCloud > Tap on your Apple ID > Input your password of Apple ID to continue.
Step 2: Tap on Password & Security > Setup Two-Factory Authentication > Tap on Continue in Apple ID Security screen.
Step 3: Then you will be directed to this screen (as below shows), and you need to input your phone number and select the way to verify your identify – with text message or phone call. For me, I select text message. And then click Next to proceed. And input password to confirm it.
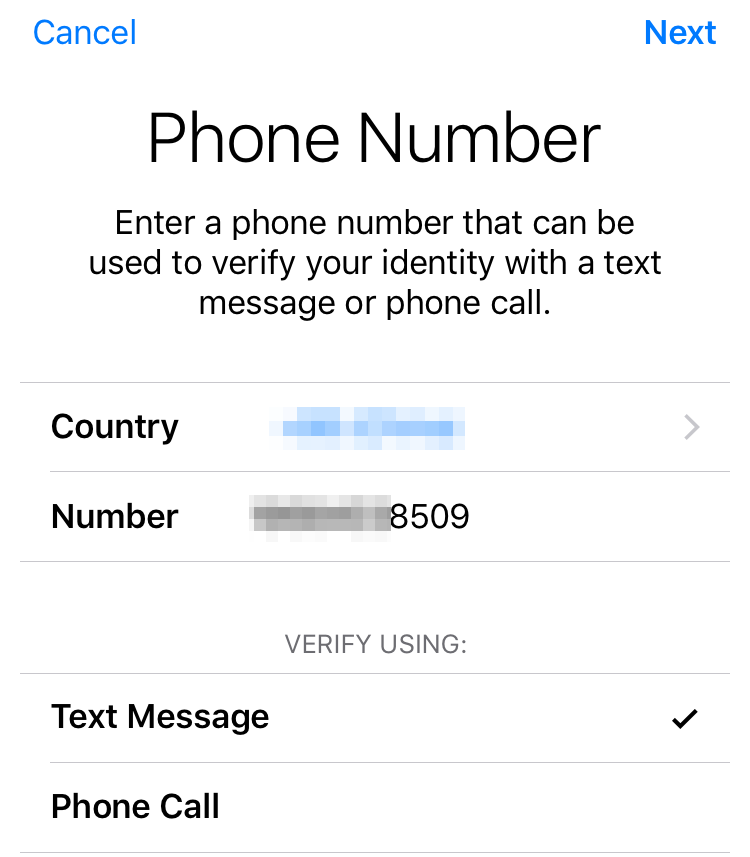
How to Turn on Two-Step Verification on iPhone/iPad/iPod touch
Note: This method only works for iDevices running with iOS 9 or later. If you also have a Mac computer, you also can turn on two-factor authentication for Apple ID with the following guide.
Part 2: Turn on Two-Step Verification/Two Factor Authentication on Mac
This tutorial is only applied to the Mac computer running with Mac OS X El Capitan or later. If you are looking for methods about how to turn on two step verification on macOS Sierra or El Capitan, you can follow the following guide to make it.
Step 1: Launch System Preferences App on your Mac computer, and then click iCloud.
Step 2: Click Account Details and input password of Apple ID to view account details.

How to Turn on Two-Step Verification on Mac – Step 2
Step 3: Select Security and click Set Up Two-Factor Authentication. And then click Set Up to proceed.

How to Turn on Two-Factor Authentication Mac – Step 3
Step 4: Input your phone number that you can receive verification code, and select the way to verify identify – Text Message or Phone Call, and then click Continue to proceed.
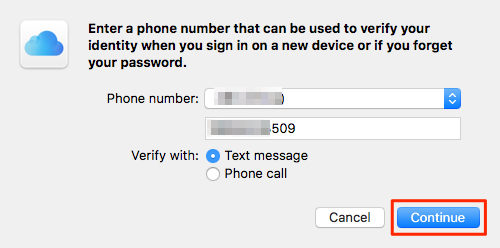
How to Turn on Two-Factor Authentication Mac – Step 4
Step 4: Input password of your Apple ID and computer to confirm it. Now you have already turned on two step verification for Apple ID on your Mac computer.