Fix Error: Unable to Move Message to Mail Trash on iPhone iPad
Summary
This post tells you how to fix the iOS 11 error "unable to move messages, the message could not be moved to the mailbox Trash".

Jun. 26, 2017
by Tom
Follow @iMobie_Inc

PhoneClean – Helps you Easily Free Up Space on iPhone/iPad 
PhoneClean – All-in-One iPhone/iPad Cleaner
Download PhoneClean to computer and use it to make your iPhone iPad run smoothly again. Supports iOS 11/10/9/8. Ready for iPhone X/8 (Plus).
You may want to get more free space for downloading some nice apps or games on your iPhone iPad. But after updating to iOS 11, when you tried deleting an email to free up your iPhone or iPad Mail app, you probably got an error saying "Unable to Move Message; The message could not be moved to the mailbox Trash", you cannot delete email from iPhone, or iPad.
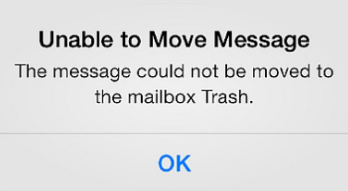
Unable to Move Messages in iOS 11
Actually, this is one of common iOS problems that you may meet on iOS 11 devices, whether on an iPhone X/8/7/6S/6 or an iPad/iPod touch. And below we gathered some fixes that may work to get you out of this error and delete emails again.
Don’t Miss: How to Retrieve Deleted Text Messages on iPhone X/8 (Plus) >
How to Fix Unable to Move Message to Trash on iPhone iPad
Firstly, you should make sure your device is connected to a stable Internet network before trying each method in the following one at a time.
Tip 1. Restart your device after disable your email account, and then enable your email account. Just go to Settings > Accounts & Passwords > Mail > your email account, and disable Mail. restart your iPhone or iPad and then turn on Mail again.
Tip 2. Delete your email accounts and re-login it again on your device. Just go to Settings > Accounts & Passwords > Mail > your email account > Tap Delete Account. After restart your iPhone, go to add email account again on your device by going to Settings > Accounts & Passwords > Add Account.
Tip 3. Make sure deleted mailbox is put to Trash on the server. Just go to Settings > Accounts & Passwords > Mail > your email account > Advanced > Deleted Mailbox under MAILBOX BEHAVIORS, make sure you have set it to Trash under ON THE SERVER.
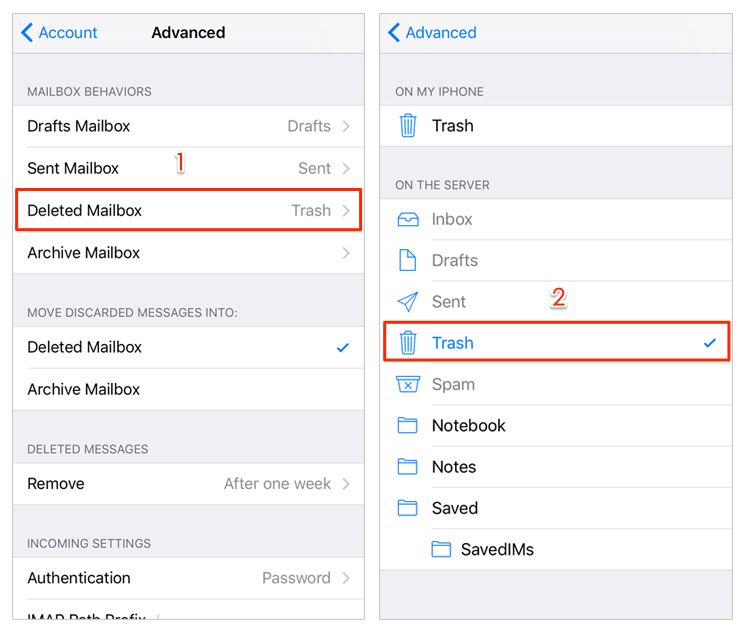
Fix iPhone Unable Move Message to Trash - Tip 3
Tip 4. Have a look inside your Mail app.
1. Open your mail app.
2. Tap on Upper Left Mailboxes option or Accounts. You will see a list of all connected accounts.
3. In the gray section, tap each account (listed in capitals) to open account details fully. You should see a list of folders for each account like "Inbox", "Drafts", "Sent", "Junk", "Trash", and so on.
4. If an account has more than one "Trash" folder, open each Trash folder and look for the folder named "Error".
5. If you find an "Error" folder, click "Edit" at top right.
6. Click the "Error" folder.
7. Choose the option to "Delete Mailbox".
8. You will get a warning that deleting the mailbox "Trash" will remove all messages, tap Continue.
9. Now try to delete your unwanted mail, if Unable to Remove Message to Trash error still exists, delete the other Trash folder to try again.
Bonus tip: How to Make iPhone iPad Run Smoothly
When iPhone iPad running for a long period, it will become sluggish and freezing sometimes. A big part of reasons is a lot of caches, cookies, and temporary files produced when using apps, such as Mail app, Safari app, etc. So if we clear up these app caches, cookies, and temporary files, it would be helpful to improve iPhone iPad performance. But how?
This bonus tip sincerely recommends a professional iOS optimization tool - PhoneClean to make it. PhoneClean is able to work for all iOS devices, iPhone X/8/7/6s/6, iPad 2/3/Air, iPod, etc. It takes just a few minutes to make your iPhone iPad run smoothly again by clearing up app caches, cookies, and temporary files. Besides, it is also capable of Internet cleaning, system cleaning, and with many other great features. So why not download it now before we get started with how to clean app caches, cookies, and temporary files with PhoneClean?
Step 1. Run PhoneClean on your computer (PC/Mac) > Connect iDevice to computer > At PhoneClean homepage, choose “Quick Clean” and click "Scan" Button.
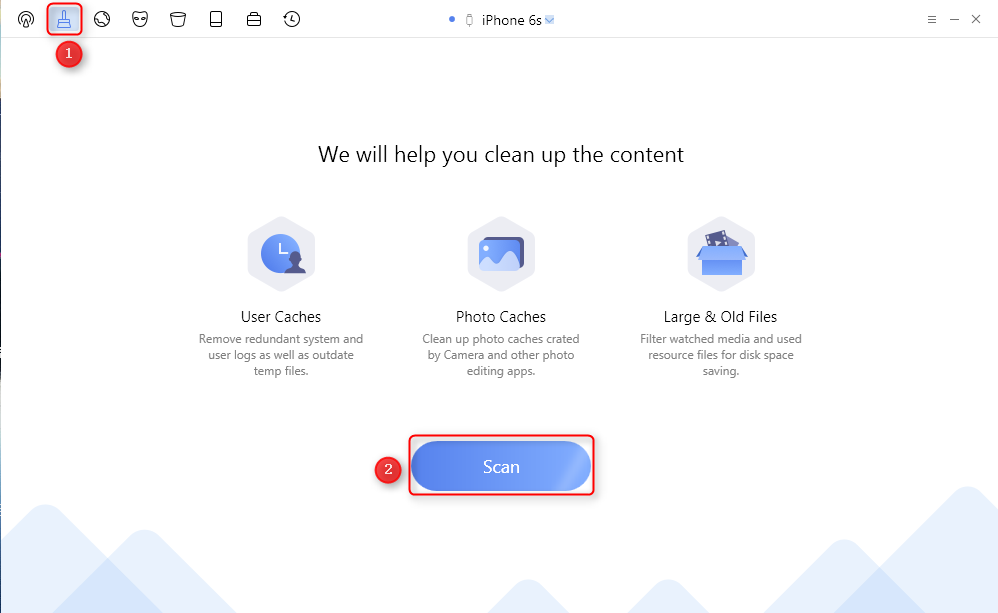
How to Make iPhone iPad Run Smoothly - Step 1
Step 2. After scanning, you can click “Review Details” to select the items you want to delete, and then click "Clean" button.
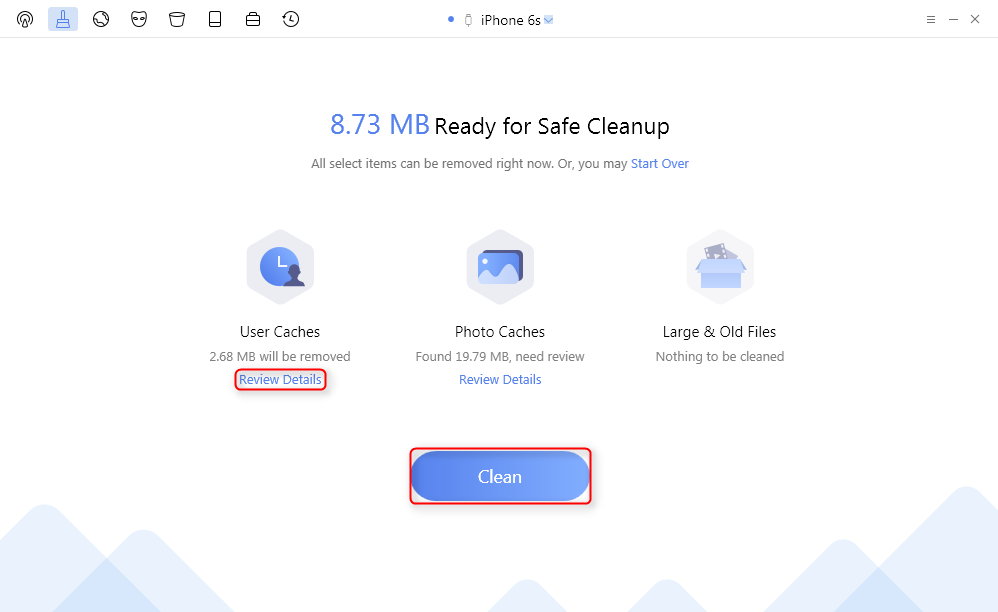
How to Make iPhone iPad Run Smoothly - Step 2
The Bottom Line
If you still cannot solve this problem and delete emails in iOS 11, you can try some other common tips, such as restart your device, restore your device or update to new software. Or you can post your ideas on the comment section to discuss it.
What's Hot on iMobie
-

New iOS Data to iPhone Transfer Guidelines > Tom·August 12
-

2016 Best iPhone Data Recovery Tools Review >Joy·August 27
-

2016 Best iPhone Backup Extractor Tools > Tom·August 16
-

How to Recover Deleted Text Messages iPhone > Joy·March 17
-

How to Transfer Photos from iPhone to PC > Vicky·August 06
More Related Articles You May Like
- How to Fix iTunes Error 3503 with 7 Methods – Read to learn how to fix the iTunes 3503 error with 7 methods. Read More >>
- How to Turn Off Auto-Brightness in iOS 11 on iPhone/iPad – This post will show you how to turn off auto-brightness in iOS 11 on your iPhone/iPad. Read More >>
- How to Increase/Decrease Text Size in iOS 11 on iPhone/iPad – Read on this guide to see how to increase/decrease text size in iOS 11. Read More >>
- How to Fix iOS 11 Apple Music Not Working on iPhone/iPad – This guide will share you some simple ways to fix iOS 11 Apple Music not working issue. Read More >>