3 Ways to Transfer Photos from iPhone to iPhone
How do I transfer photos from iPhone to iPhone? Read the guide to get 3 ways to transfer photos from one iPhone to another.
According to our users’ report, they usually have the plan to transfer photos from one iPhone to another in the following cases:
- Get a new iPhone 8/X/XR/XS (Max), and want to transfer photos from old iPhone to new iPhone.
- Have some interesting photos, and want to share photos between your iPhone and your families’ or friends’ iPhone.
- Or just want to transfer photos from one iPhone to another for an extra backup.
No matter which situation you are in, you are totally on the right page. In the post, we focus on how to transfer pictures from iPhone to iPhone and offer you 3 ways to make it.
Part 1: How to Transfer Photos from iPhone to iPhone without iCloud/iTunes
A powerful but easy-to-use iPhone content manager, AnyTrans for iOS can help you transfer files between iOS devices quickly and safely. While transferring photos from one iPhone to another, here are some features you need to know:
- Support transferring almost all types of photos and albums like Camera Roll, iCloud Photo Library, Live Photos, Panoramas, Screenshots, Photo Share, Selfish, etc.
- Offer two transfer options. Allow you to transfer all photos from iPhone to iPhone in one click, or you can preview the pictures first and then selectively choose some to transfer.
- Ensure fast transfer speed, which enables you to transfer 3000 photos within 5 minutes. Besides, it keeps the original picture quality.
- Guarantee 100% Safe & Security. During the transferring process, all the contents on your two iPhones will be kept safe. No iCoud/iTunes restore, namely, no any data coverage and data loss.
- Available on both Windows and Mac computer, and it works for all iPhone, iPad, and iPod, including old iPhone model such as iPhone 4s/5s/6/7 and the latest iPhone X/XR/XS (Max).
Here free download AnyTrans for iOS and install it on your computer. Then follow the steps below to get 2 options to transfer photos from iPhone to iPhone quickly and safely.
Free Download * 100% Clean & Safe
Option 1. How to Transfer Photos from one iPhone Another Selectively with AnyTrans for iOS
Step 1 Run it > Connect both of your iPhones to the computer (PC or Mac) with its USB cable > Go to the category page.
How to Transfer Photos from iPhone to iPhone Selectively – Step 1
Step 2 Select Photos > Pick up the album with the photos you want to transfer.
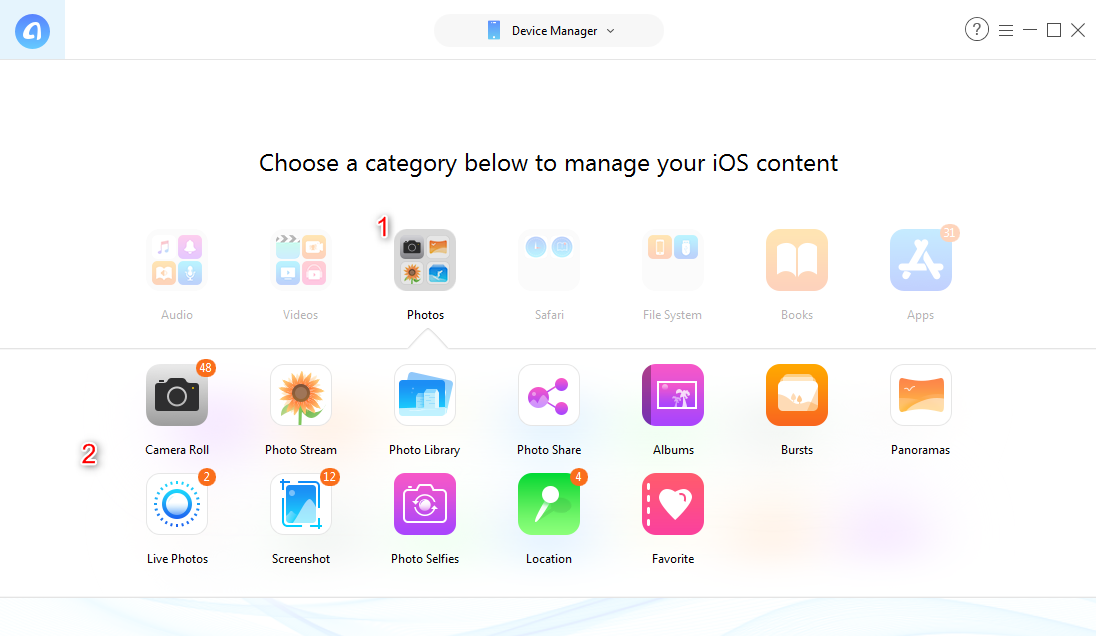
How to Transfer Pictures from iPhone to iPhone Selectively – Step 2
Step 3 Select the specific photos you want to transfer > Click To Device button to transfer photos to another iPhone.

Transfer Photos from iPhone to iPhone Selectively – Step 3
Option 2. How to Transfer All Photos from iPhone to iPhone with AnyTrans for iOS
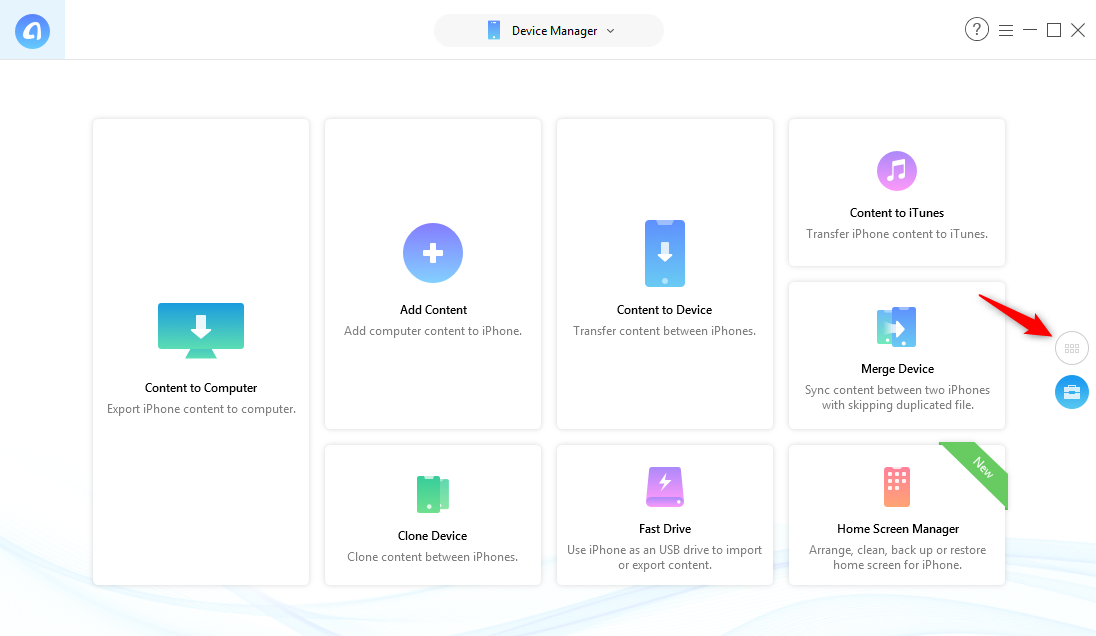
Step 1 Go to shortcut screen > Click Content to Device option.
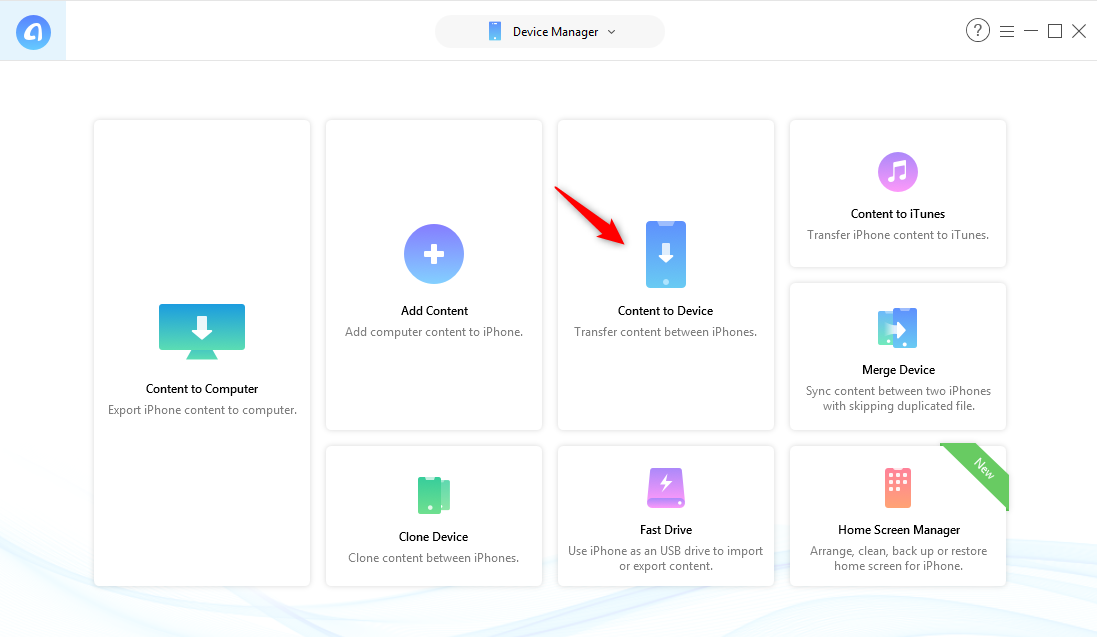
How to Transfer All Photos from iPhone to iPhone – Step 1
Step 2 Confirm your target iPhone and continue.
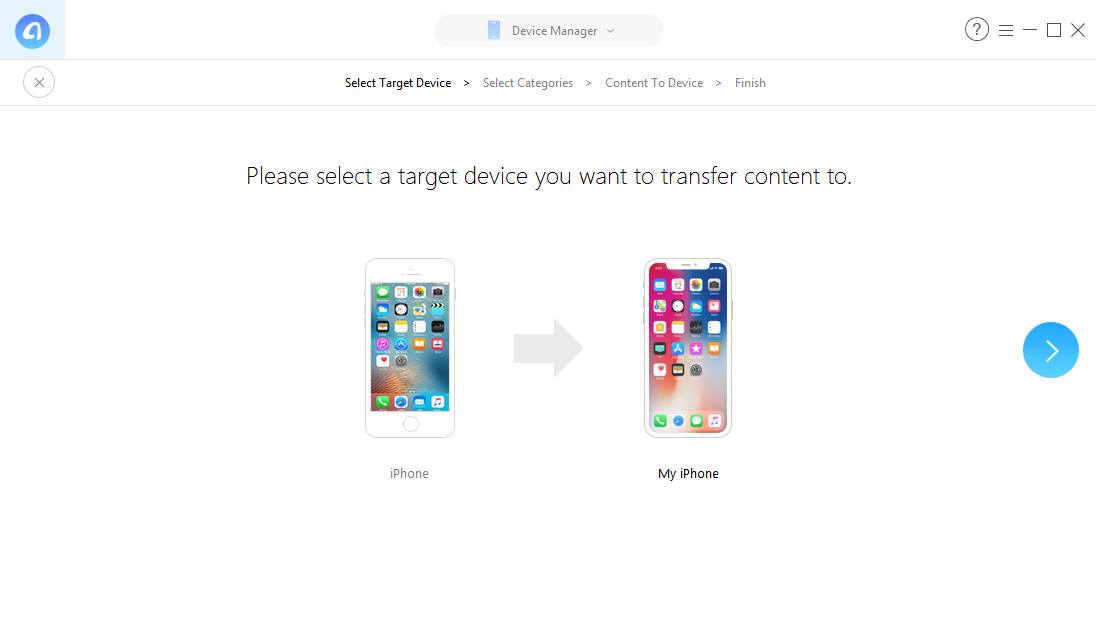
How to Transfer All Photos from iPhone to iPhone – Step 2
Step 3 Select the items you want to transfer to another iPhone > Click the Start Transfer button.
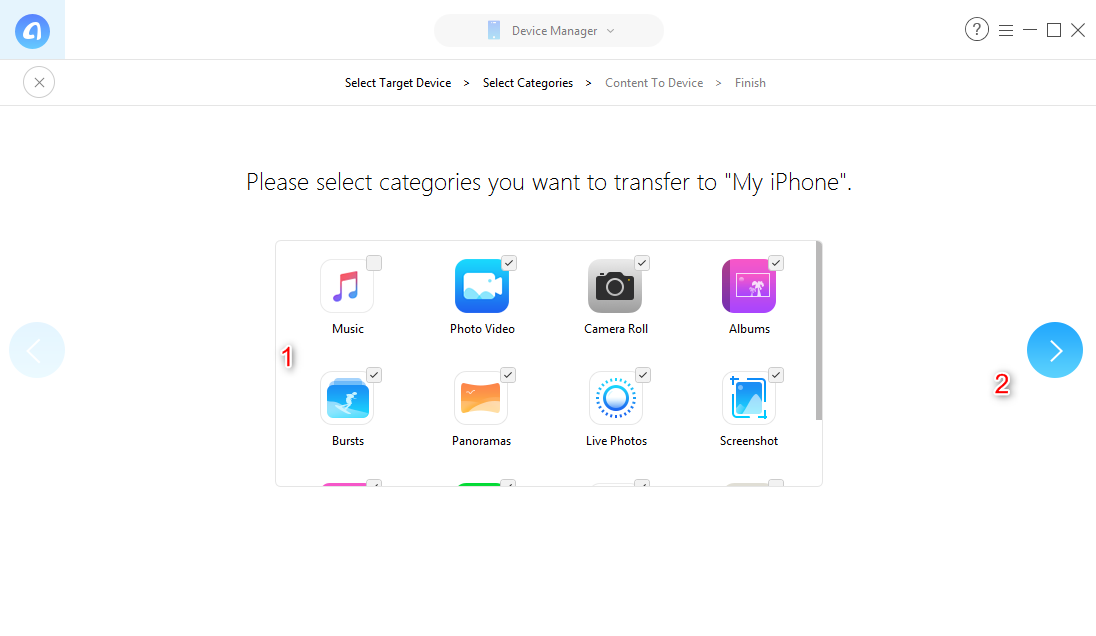
How to Transfer All Photos from iPhone to iPhone – Step 3
- Option 1 is perfect when you want to transfer part of photos from one iPhone to another, and Option 2 is suited for you when you need to transfer all photos from iPhone to iPhone.
- If you just get a new iPhone, in addition to only transfer photos from an iPhone to another, you can actually transfer more data from old iPhone to new iPhone with AnyTrans for iOS.
Part 2: How to Transfer Photos from iPhone to iPhone Using iCloud
iCloud Photo Library allows you to sync photos across all iOS devices. It replaced the traditional Camera Roll and Photo Stream options with an All Photos section. There is no 30 days or 1,000 photos restriction either. There are some tips to know before starting the tutorial about how to transfer photos from old iPhone to new iPhone via iCloud:
- The two iPhones need to be iOS 8.3 or later.
- You need to enable iCloud Photo Library on both iPhones.
- The two iPhones should log into same Apple ID.
- You will need to be connected to a wireless network to upload the photos.
- You need to make sure there is enough iCloud storage space since iCloud Photo Library uses your iCloud storage allotment.
When you transfer photos from iPhone to iPhone via iCloud, you are not allowed to preview or select the photos before transferring. Besides, you can’t transfer the photos that are synced from the computer and your photos may get lost during the process. To avoid all these troubles, just jump to Part 1.
Step 1. Log in iCloud
Launch the Settings > Tap on your account > Tap on iCloud > Tap on Photos.
Step 2. Enable iCloud Photo Library
Toggle the “iCloud Photo Library” ON.
Step 3. Photo Quality Settings
Choose “Optimize iPhone Storage” or “Download and Keep Originals”.
Step 4. Upload Photos
It takes a while to upload photos to the iCloud Photo Library. After it is done, you will be able to access them from an All Photos album in the iPhone’s Photos app.
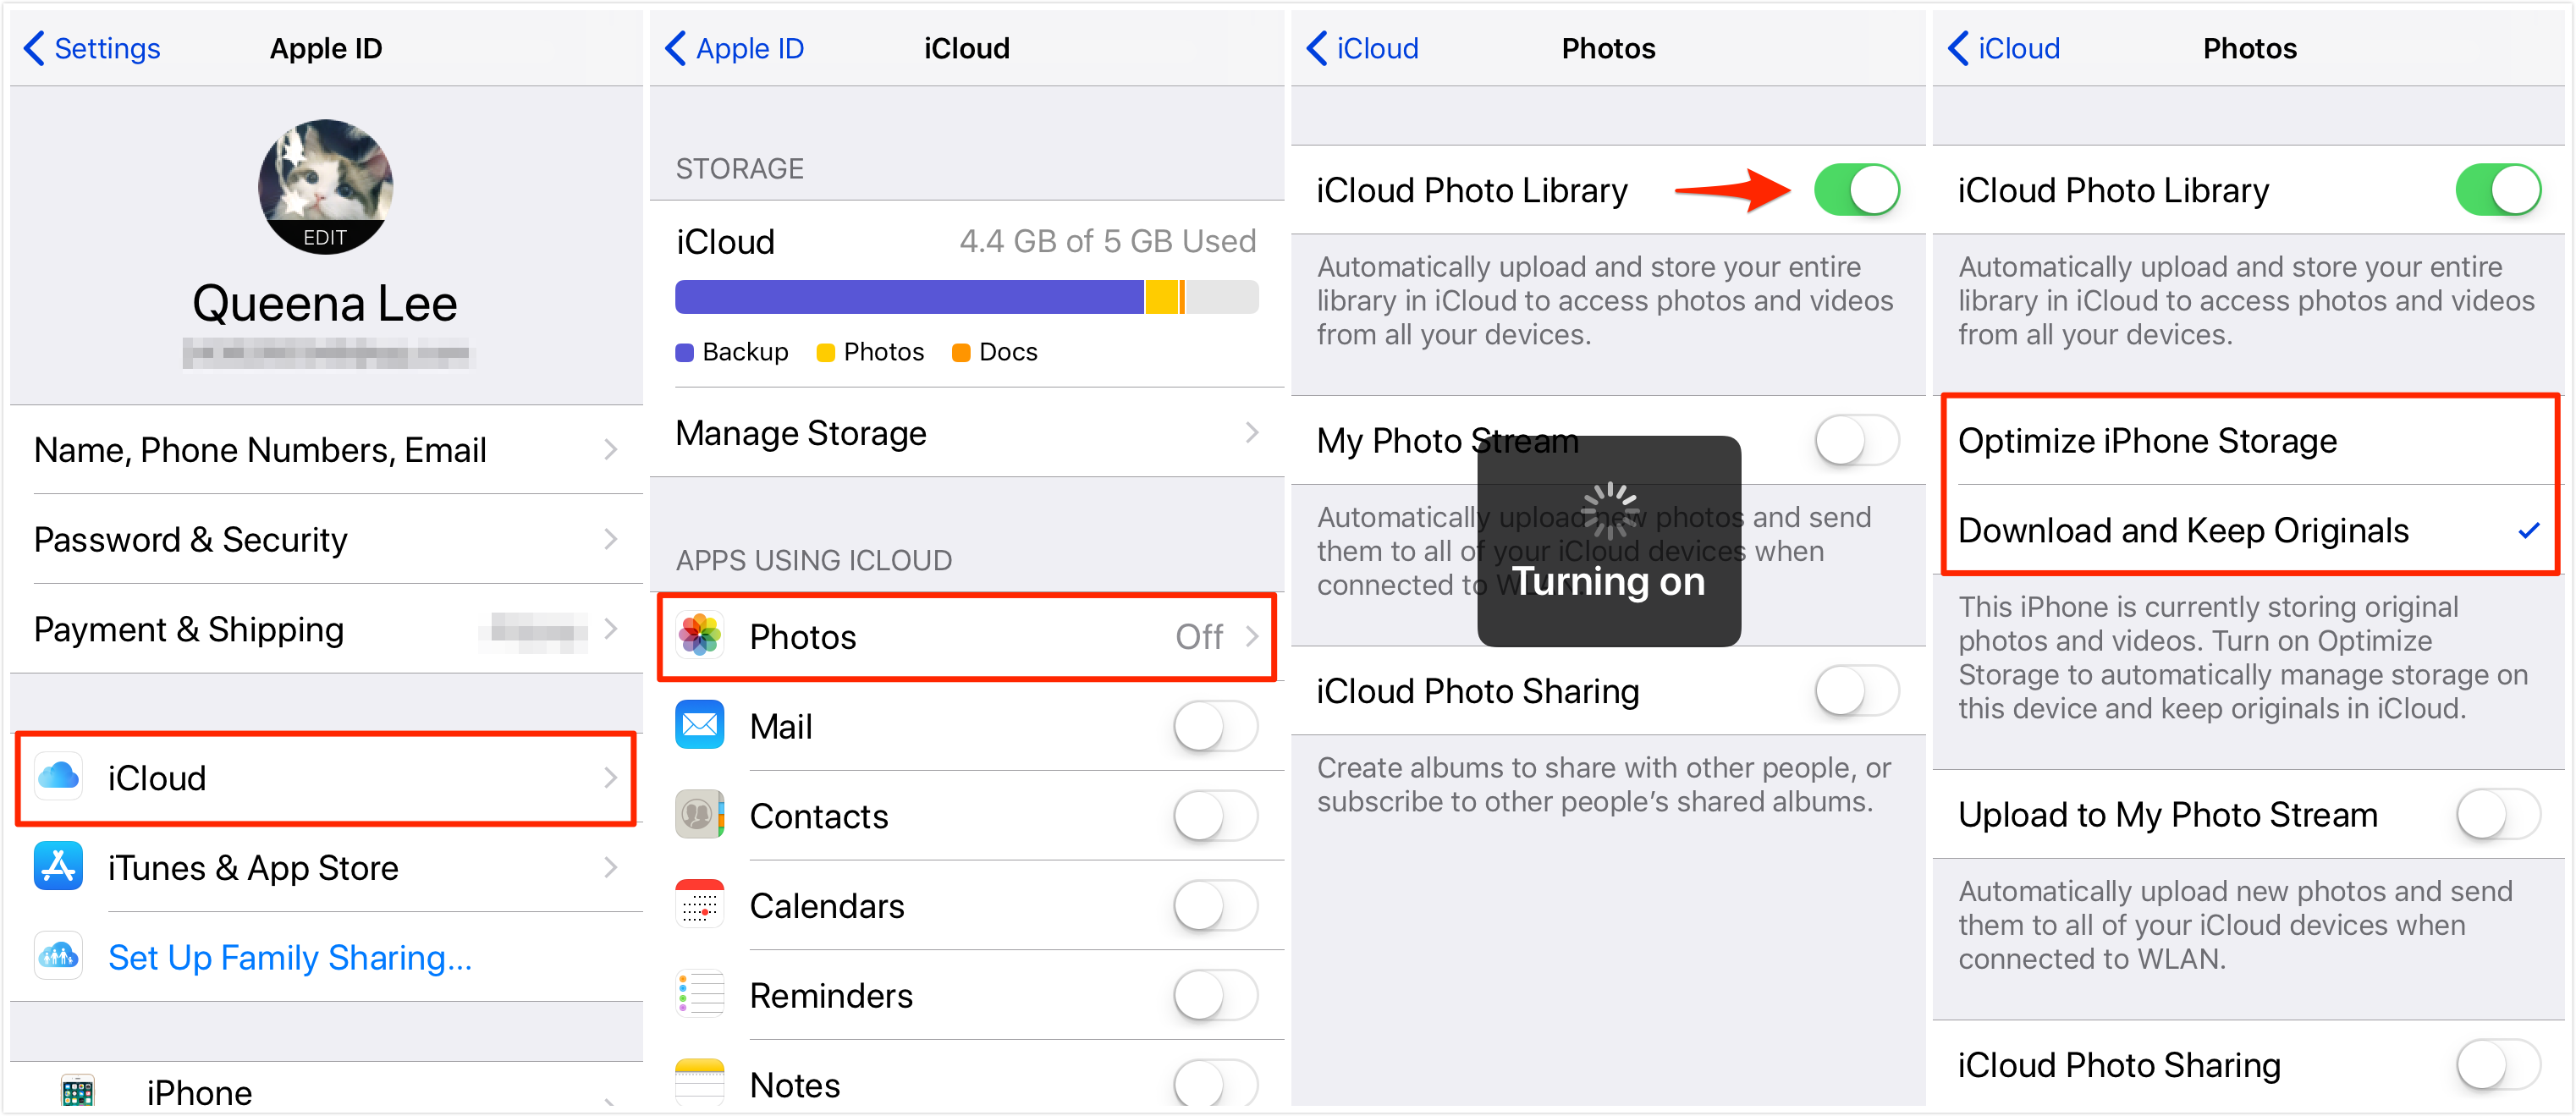
How to Transfer Photos from iPhone to iPhone Using iCloud
Part 3: How to Transfer Photos from iPhone to iPhone Using iTunes
When you try to use iTunes to transfer pictures from old iPhone to new iPhone, you can only transfer the photos in Camera Roll while the photos in iCloud Photos Library, Photos Synced from computer, Shared photos are not included. What’s worse, it will wipe all existing data on your old iPhone and replace with the content in iTunes library. Just jump to Part 1 to transfer pictures from iPhone to iPhone without iTunes.
Step 1 Transfer photos from iPhone to computer.
For Mac users: You can import photos from iPhone to Mac with iPhoto: Connect your iPhone to Mac with USb cable > Launch iPhoto if it doesn’t open automatically > Pick up the photos you want to transfer > Click Import or Import Selected to transfer photos from iPhone to Mac. Except for iPhoto, you also can transfer photos from iPhone to Mac with Preview, Image Capture or Aperture.
For Windows user: You can export iPhone photos to computer with AutoPlay with following steps: Connect your iPhone to computer with USB cable > Click Import Pictures and Videos when AutoPlay appears > Choose a destination for your iPhone photos > Click Import.
Step 2 Transfer photos from computer to another iPhone with iTunes: Connect your new iPhone, family or friends’ iPhone to computer with USB cable > Launch iTunes if it doesn’t run automatically > Click the Device button in the upper right corner of iTunes > Click Photos > Select Sync Photos from Application or Folder > Click Apply.
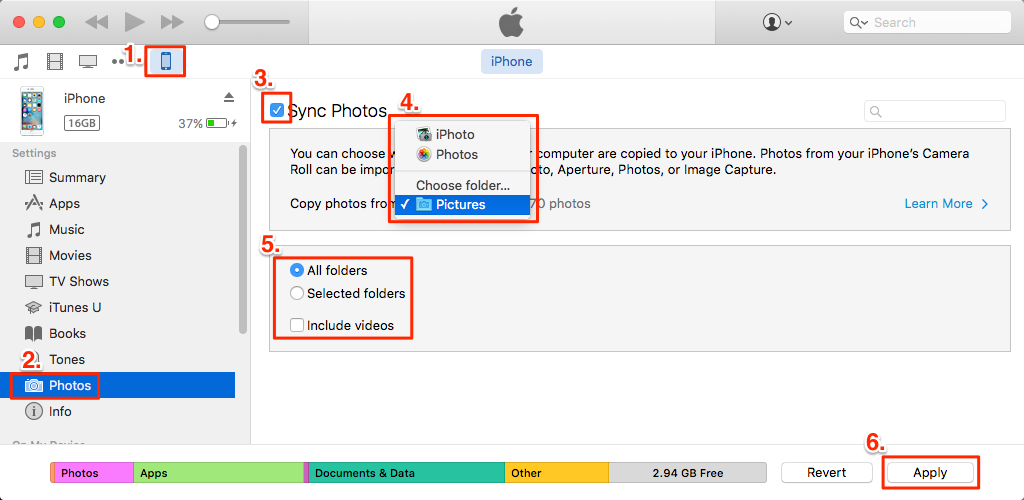
How to Transfer Photos from iPhone to iPhone with iTunes
If you have turned on iCloud Photo Library on your iPhone, a window will show “iCloud Photos is On”. That means you have to turn off iCloud Photo Library to complete the transferring process via iTunes. Otherwise, your iTunes won’t allow you to transfer photos. But if you turn off iCloud Photo Library on iPhone, all the photos stored in iCloud but not on your device will be deleted. If you want to keep all your precious photos and prefer an easier way, Part 1 is your best choice.
The Bottom Line
Apparently, compared with the iCloud and iTunes way, AnyTrans for iOS offers you a much easier way to transfer photos from iPhone to iPhone. Except for photo transfer, it also supports transferring more 20+ files from iPhone to iPhone, including contacts, messages, notes, music, etc. Why not free download it and have a try now >

Member of iMobie Inc., is also a more than 3-year user of iPhone, iPad and iMac, like to fix all kinds of iOS and Mac OS problems.
Product-related questions? Contact Our Support Team to Get Quick Solution >
AnyTrans ® for iOS
The best tool to transfer, backup and manage your iPhone iPad content, even iTunes, iCloud backup files. As easy as ABC!
- * 100% Clean & Safe
Users Served
Hot & Trending
 How to Transfer Notes from iPhone to iPhone XS (Max)/XR/X/8/SE/7/6s
  How to Sync iPhone Photos to iPad in 3 Ways