Download AnyTrans to Start Your iOS Contents Management Experience!
How to Use AnyTrans
Welcome to AnyTrans Online Guide. Here you can find all detailed tutorials about how to manage your iOS contents between iOS devices, iOS device & computer, iOS device & iTunes, iOS device & iCloud as well as data stored on iTunes and iCloud backups, move Android device data to iTunes, iCloud and iOS device, and arrange home screen, customize ringtones and search & download apps for iOS device. If you still have questions after reading this guide, please do not hesitate to contact our , and you will receive reply within 24 hours.
Download Now *Available for Windows and Mac computer.
Buy Now * Enjoy lifetime upgrade and support.
-
 Get Started
-
 1-Click File Management
-
 Personal File Management
-
 Audio Management
-
 Photos Management
-
 Videos Management
-
 iTunes Library Management
-
 Backup Manager
-
 iCloud Manager
-
 Media Downloader
-
 iOS Mover
-
 Ringtone Manager
-
 App Downloader
-
 Social Messages Manager
Get Started
Learn the basics, settings and license code register of AnyTrans. Then, please refer to the following guide to facilitate your AnyTrans use.
Supported iOS File Types
| Media Data | Music, Playlist, Audio Books, Movies, Home Video, TV Shows, Music Videos, Photo Video, Time-lapse, Slow-Mo, Podcasts, iTunes U, Ringtones, Voice Memo |
| Personal Info | Contacts, Messages, Voice Mail, Books, Notes, Calendars, Safari Bookmarks, Safari History, Apps, WhatsApp Messages, LINE Messages, Viber Messages |
| Photos | Camera Roll, Photo Stream, Photo Library, Photo Share, Albums, Bursts, Panoramas |
Supported Android File Types
| Media Data | Music, Movies, Ringtones, Photo Library |
| Personal Info | Contacts, Messages, Call Log, Calendars, Zipped Files, Document, Books |
Basics
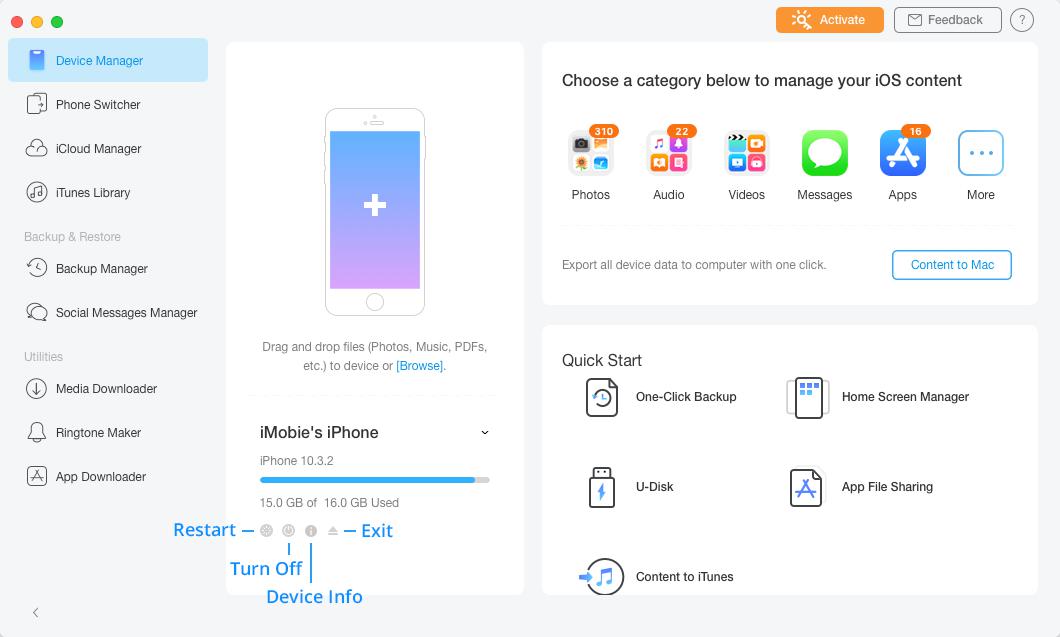
Please launch AnyTrans on your computer and connect your iOS or Android device after installing it successfully. Then, the main interface will display. And you can click  button to display AnyTrans in full screen as you need.
guideat-get-started1
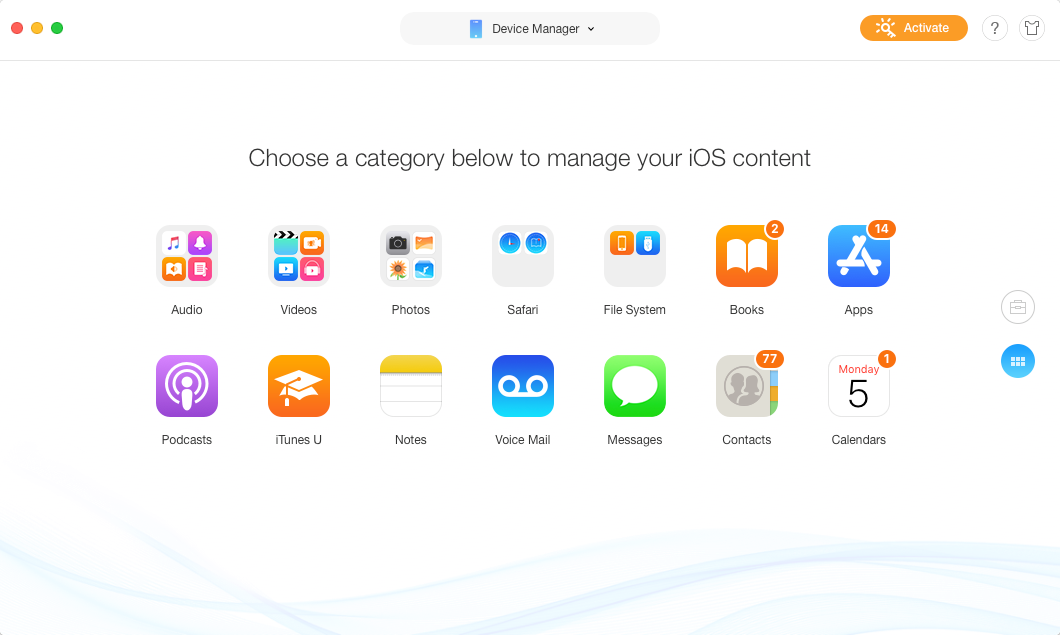
To transfer your iOS data by category, please click![]() button.
button.
guideat-get-started2
To make use of more functions of AnyTrans, please click the drop – down box next to Device Manager:

guideat-get-started3
Meanwhile, in the particular file management page, you can manage your files by clicking function buttons on the upper right corner as you need.
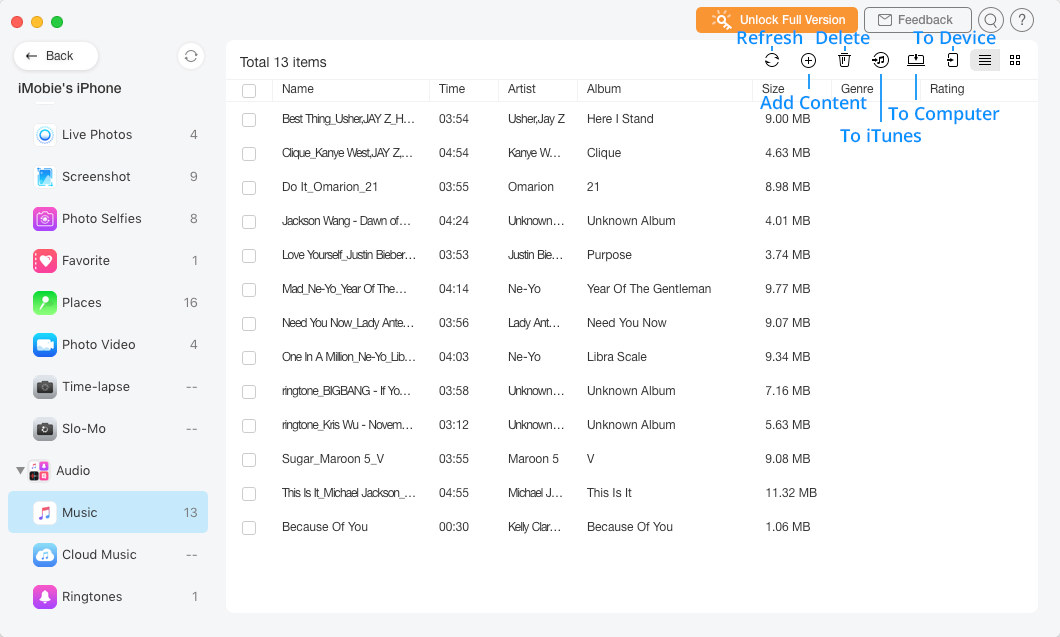
guideat-get-started4
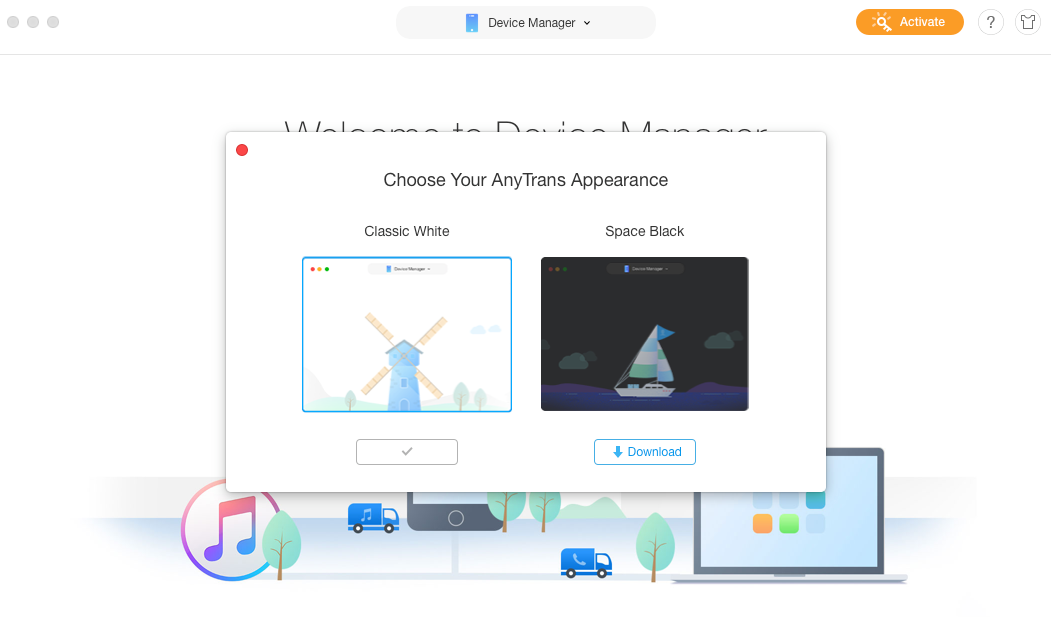
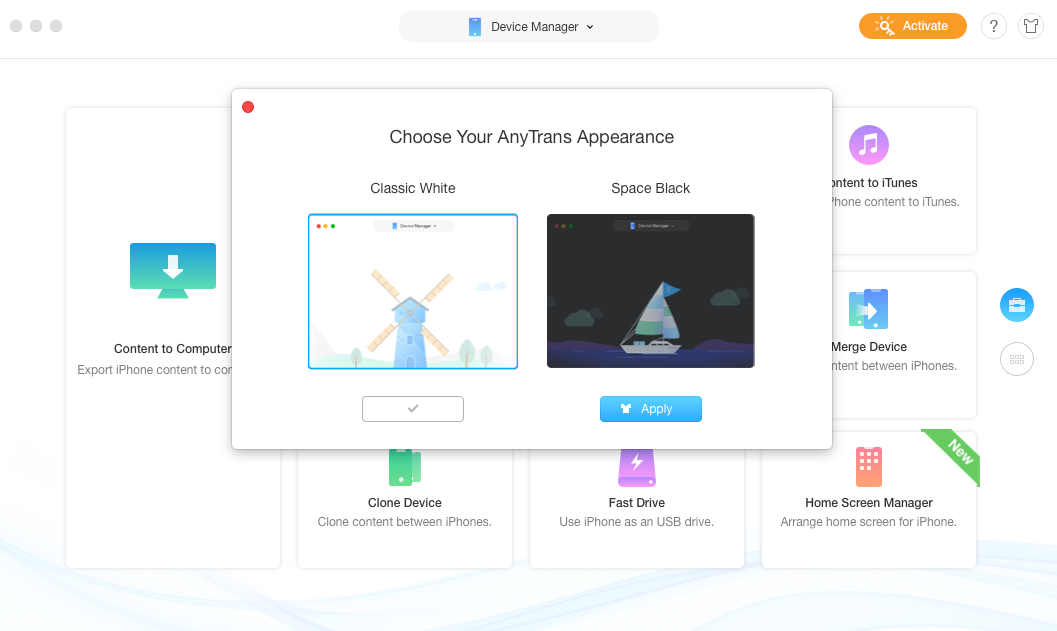
Switch Appearance
To match up with iOS device appealing appearance, except Classic White, AnyTrans also adds the Space Black appearance. Firstly, please click Choose Appearance in the tab menu of AnyTrans or click  button in the upper right corner. Then, please click “Download” button to download the Space Black appearance based on your needs.
guideat-get-started5
Meanwhile, please make sure the Internet connection is fine during the downloading process. After the downloading process completes, please click the ![]() button to switch the appearance as you need.
button to switch the appearance as you need.
guideat-get-started6
If you choose to apply the Space Black appearance, the interface below will display.

guideat-get-started7
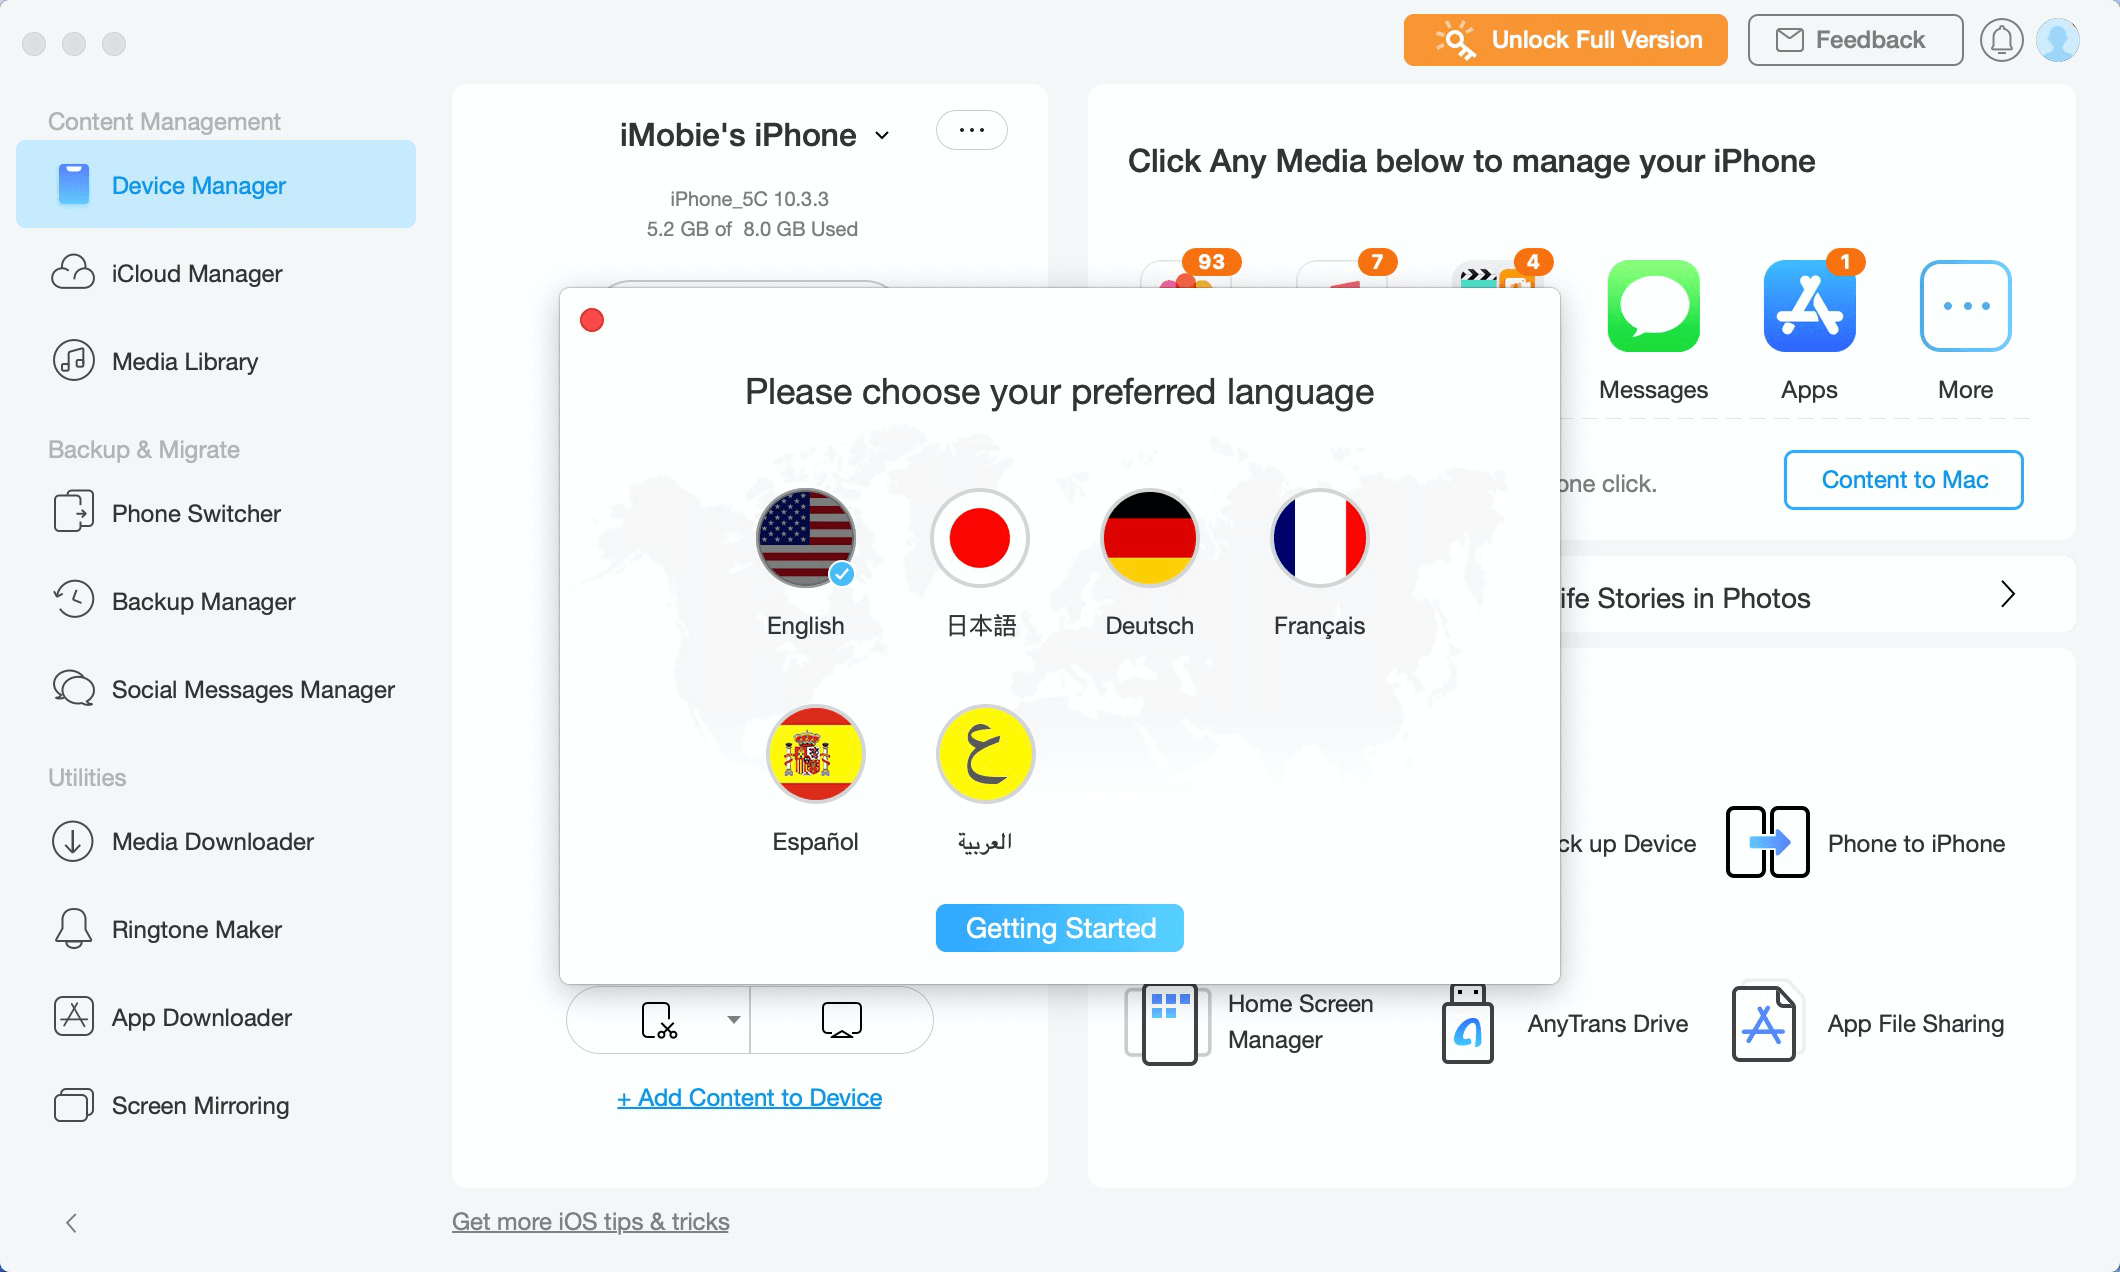
Settings
To make good use of AnyTrans, please learn how to set up AnyTrans prior to your use. AnyTrans supports 6 languages (English, Japanese, German, French, Spanish and Arabic).You can choose preferred language when you firstly launch AnyTrans or change it from the menu bar.
guideat-get-started8
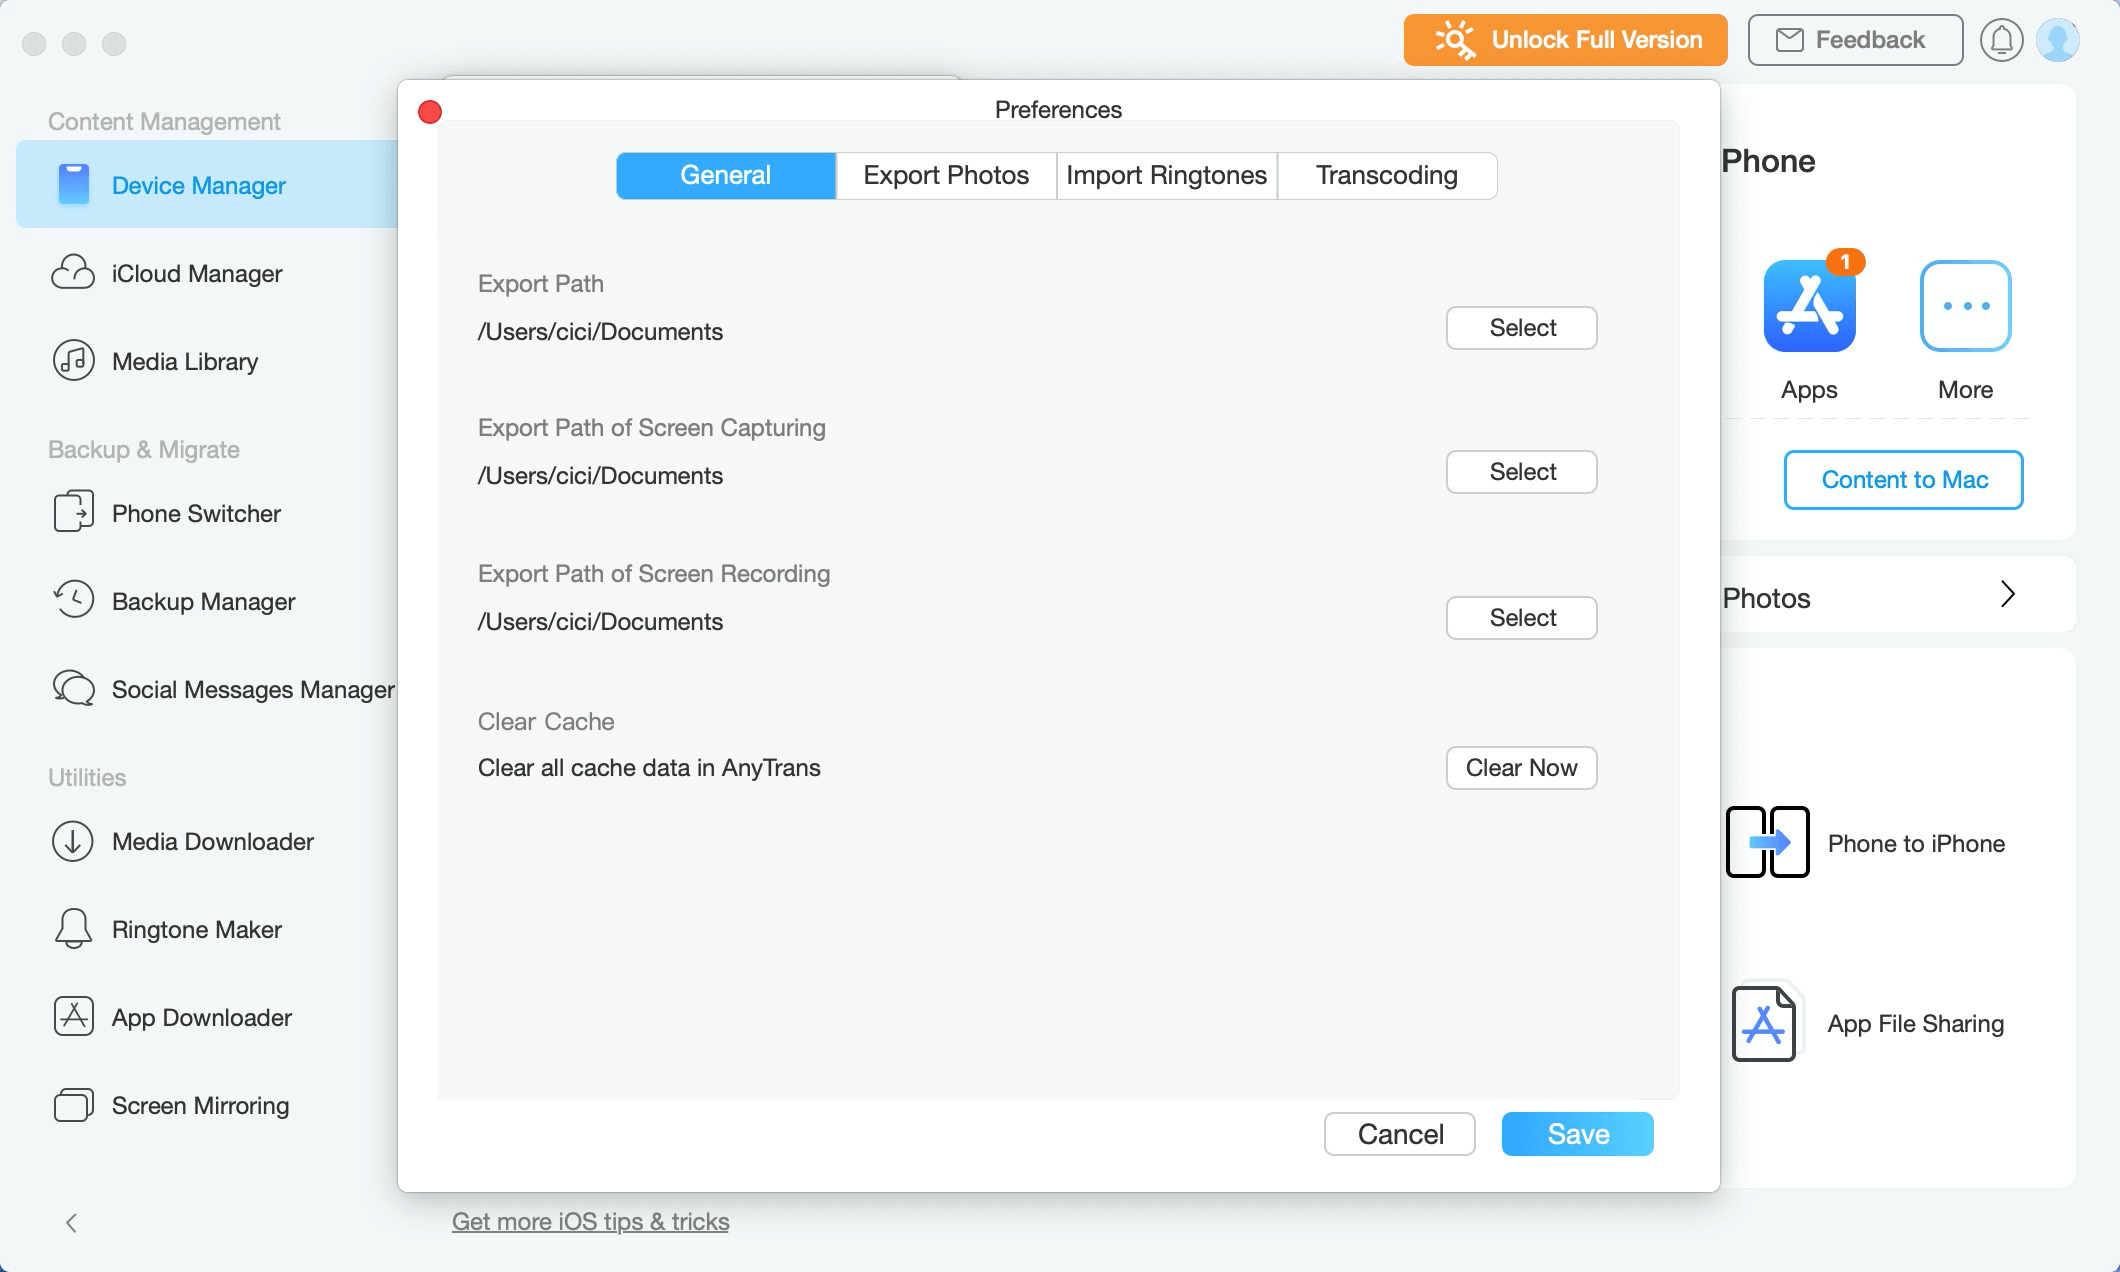
You can also change your preferred settings for Apps, Ringtones and Transcoding under Preferences in menu bar.
guideat-get-started9
You can set the output format and the backup path for your personal data, including Safari History, Safari Bookmarks, Contacts, Call History, Calendar, Messages and Notes.
guideat-get-started10
Register
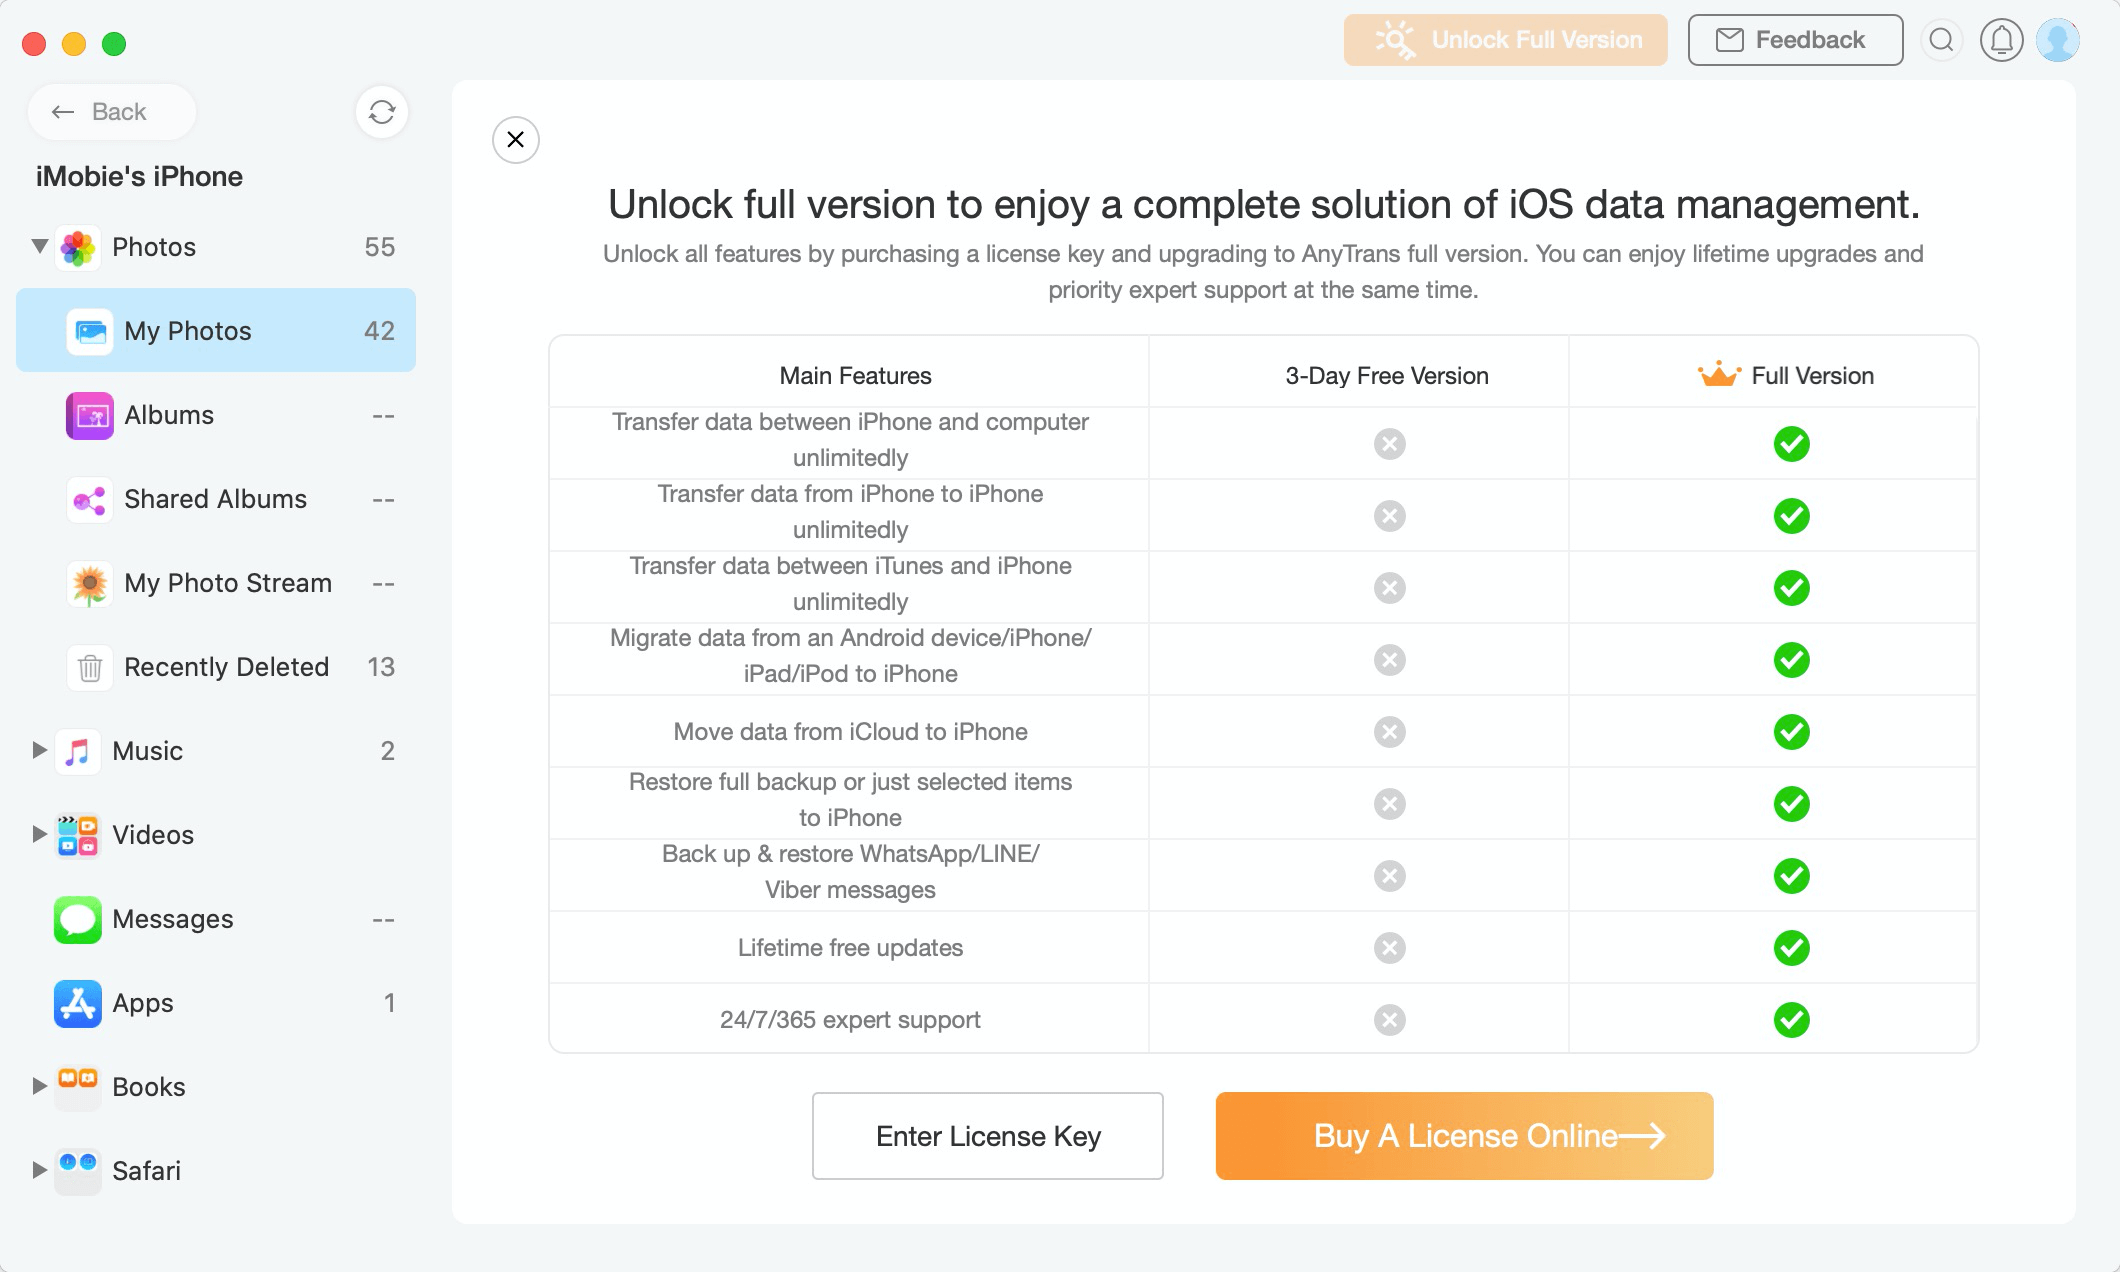
With the trial version of AnyTrans, you will be able to transfer 30 items per day and it will last for three days after installation.
guideat-get-started11
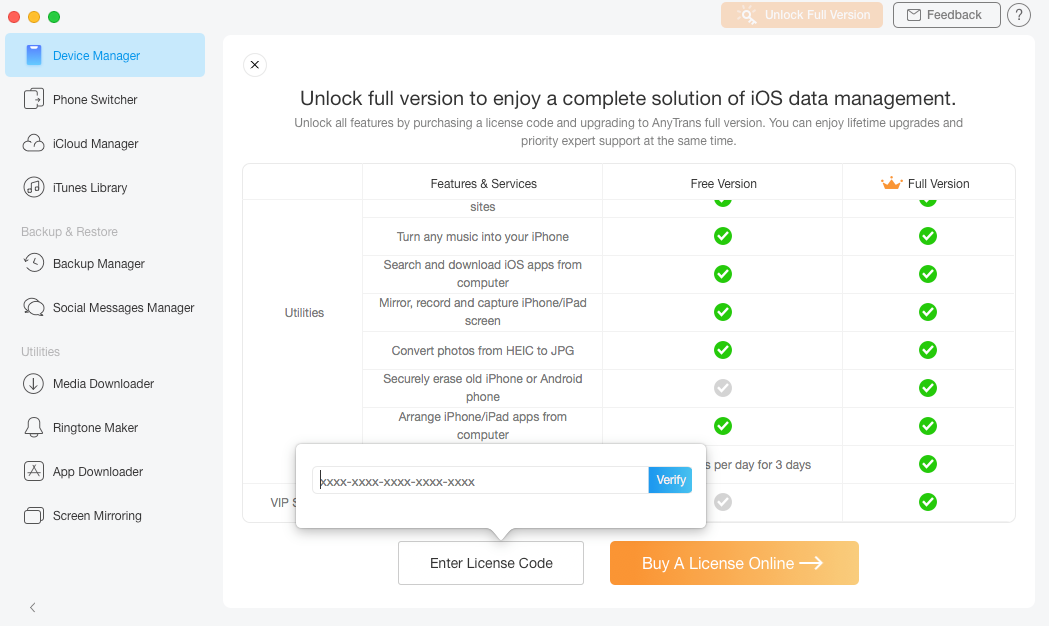
To enjoy all features completely without limitations, please click ![]() button to purchase AnyTrans from website. If you already have one, please tap
button to purchase AnyTrans from website. If you already have one, please tap ![]() button and then copy & paste the license code to avoid any typing mistakes. Meanwhile, please make sure the Internet connection is fine when you register.
button and then copy & paste the license code to avoid any typing mistakes. Meanwhile, please make sure the Internet connection is fine when you register.
guideat-get-started12
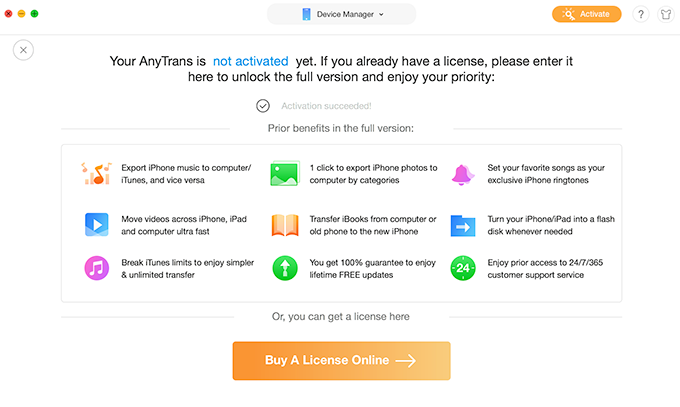
Once AnyTrans registers successfully, the interface below will display.
guideat-get-started13